
08.08.2008: I just came back from my summer vacation, so I have not yet started building again. But I thought I put a short update online non the less. We have made a tour through Southern California, and even though the routing of our tour was made with priority to the wishes of the family, we still passed some aviation related subjects.
In San Diego we visited the aircraft carrier USS Midway, which was converted to a floating museum. Here a view from the “tower”:
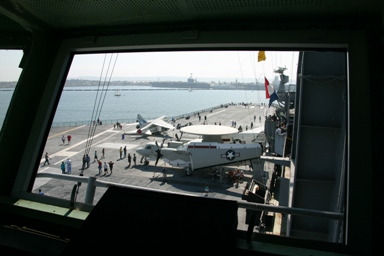
Couldn’t we put one as a floating airport on the Lake of Constance? This would solve problems with the neighbourhood with noise…
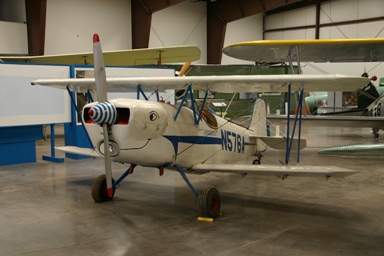
We also passed an aviation museum near the Grand Canyon. Next to the usual variety of military hardware, which seems to be a must for every museum in the US, they also had a surprising variety of kitplanes on display. Here a few of them:
A BD-5,
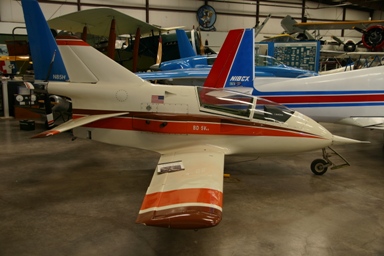
KR-2,
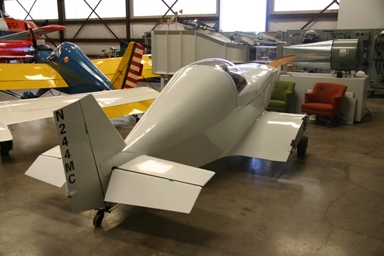
Long-EZ,
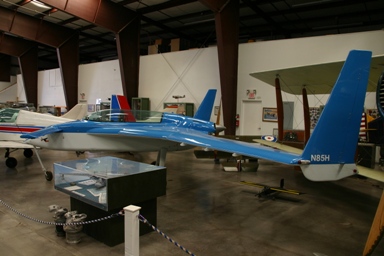
SA-100 and quite a few more.
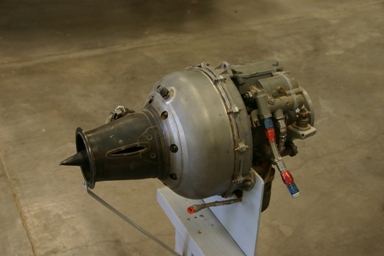
They also had a small Williams turbine on display, which was initially developed to power small target planes. It just seems to scream “put me in a kitplane”. It’s technical data is: approx. 25 cm / 10 inches diameter, 20 kg / 44 lbs weight and 80 kg / 180 lbs of thrust. Compare this with a Rotax 912, which weights about four times as much and gives only about twice the thrust, so a twin engine jet powered SportCruiser variant seems feasible…
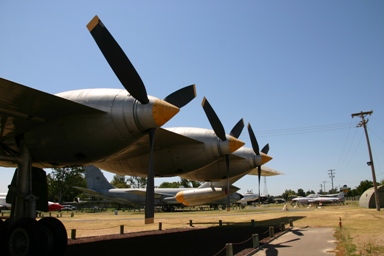
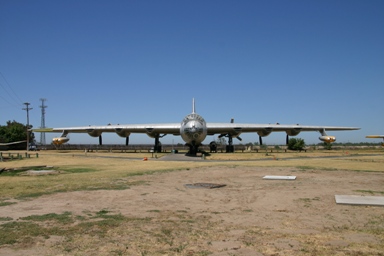
Later on our tour we passed the Castle Air Museum, which houses quite an impressive collection of former US Air Force planes. Some of them I have seen before, but many in the collection are unique, such as the Convair B-36, the larges (in size) bomber ever built, powered by six 3800 hp radial engines and four J47 jet engines.
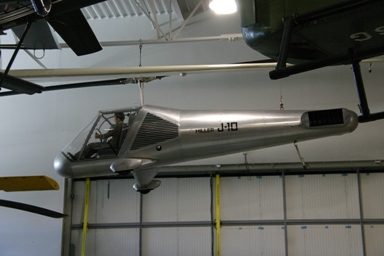
We also passed the Hiller Aviation Museum, which, as the name suggests, contains many of the Hiller helicopters and vertical take off machines. It is located where the Hiller factory once stood and contains many very special artefacts. Here some of them:
The Hiller J-10 was the first helicopter with a standard rotor but no tail rotor. Today this is called a NOTAR, it was just ahead of the time when it was built.
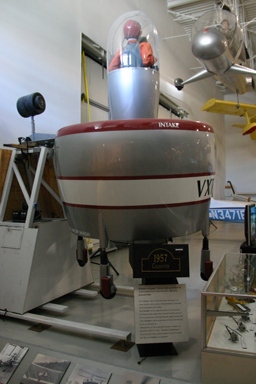
Then they had several of the experimental one man VTOL crafts Hiller built, such as this one. Knowing the discussion one EAS member had with the BAZL regarding certification and licensing requirements for his Autogyro I wonder what they would do if someone built something like that…
They also had a BD-5, of which more seem to be in museums than are still flying….
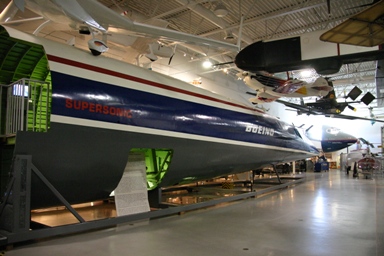
Even more spectacular was the front section mock-up of the Boeing SST which they have on display, it was once planned to be a competitor to the Concorde.
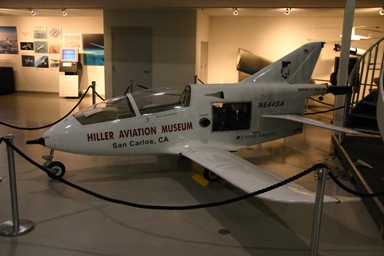
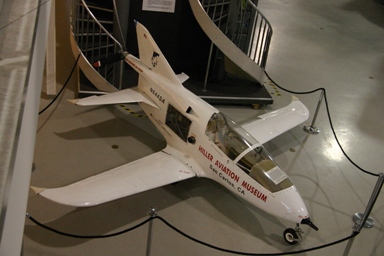
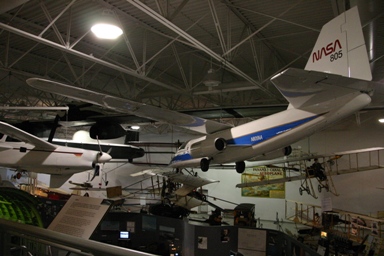
Below the AD-1, an oblique wing demonstrator built by the nearby NASA/Ames research centre. It could rotate the wing from 0 to 60 degrees.
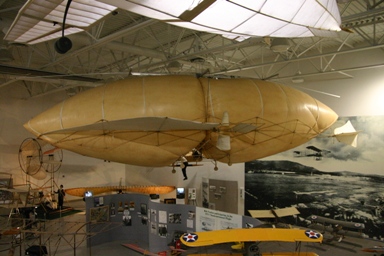
They even have a replica of something called “the Avitor”, a mixture between plane and balloon, built and flown in San Francisco in 1869!
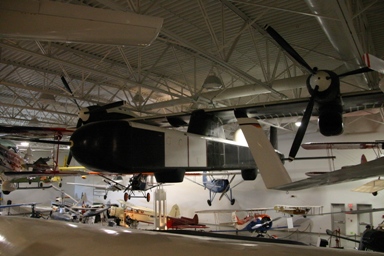
The largest exhibit is the first pilotless high altitude reconnaissance aircraft ever built, called Condor, with a wingspan of 60 m / 200 ft. It flew up to 67’000 ft on two 175 hp piston engines.
And finally, while we were strolling along the Fisherman’s Wharf in San Francisco, I noticed an airplane making circles over the Golden Gate Bridge and the bay. Looking a bit closer I realised it was an Airbus A 380 on a publicity flight for Emirates! I read in the newspaper that they will open flights to San Francisco later in 2008.

16.08.2008: Today I attended the annual fly-in of the EAS, the Experimental Aviation of Switzerland association. It took place in Buochs, a former Swiss Air Force base which is now in “sleeping mode”. It is however also the airport where Pilatus Aircraft, maker of the famous PC-6 Porter, PC-12 as well as a line of military trainers is located.
Initially I intended to fly there with one of our flying club’s Archer II, but due to a booking error there was no plane for me when I showed up at the airport in the morning. Fortunately Urs, another local builder (of an FK-12 Comet), had also planned to attend the meeting and had a reservation for our Piper L4. As he had an empty seat we shared the ride.
After extreme rainfall on Friday the weather looked much better on Saturday, but there were quite some low clouds in the morning (5/8th at approx 2100 ft, which is only 700 ft above our airfield. We took off non the less, together the two other local builders Andreas in his Breezer and Thomas in his Kitfox, to give it a try.
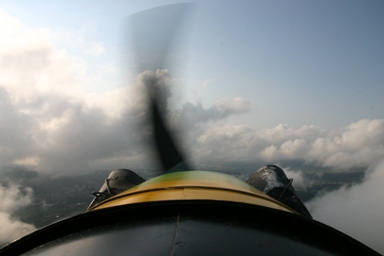
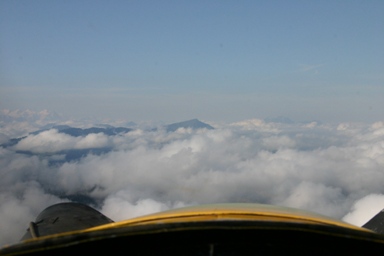
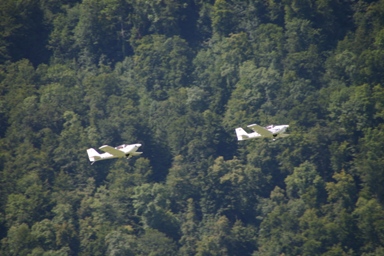
Initially we flew slalom around the clouds, but we then decided to try flying “on top”, so the three of us climbed through a bigger hole to above the clouds. This felt like in the old days flying glider…
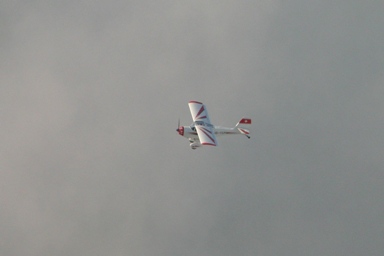
Below a picture of the Kitfox, circling below us, the Breezer was already a bit higher, as it is quite a bit faster than the Kitfox and the L4 (which is not really difficult).
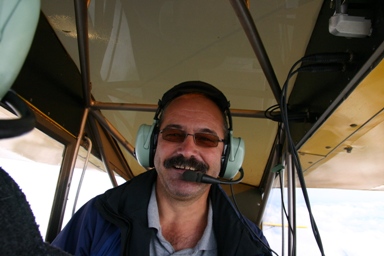
Here Urs, my pilot on the outbound leg. We both have the habit of flying the L4 from the back seat, even with a passenger in front. This makes watching the instruments a bit difficult, but in an L4 you don’t really need them anyway.
On top things looked much better, fortunately the cloud level was just above 5000 ft which allowed us to stay below the TMA of Zurich Airport. The L4 is not transponder equipped, so no way of going in there.
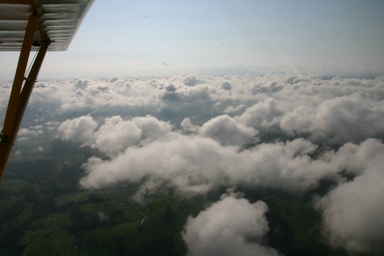
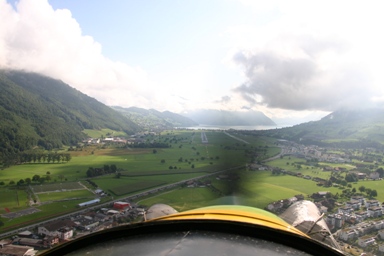
Buochs Airport is located just opposite of the Rigi mountain (the one in the middle of the picture below), which makes navigation quite easy…
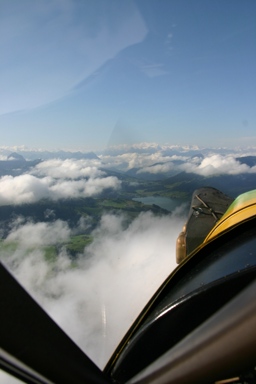
When we approached the Lake of Four Cantons, where Buochs is located, the cloud density decreased, making the descent easy.
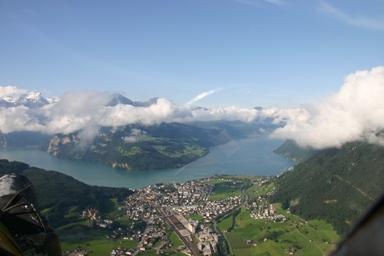
Here the reporting point Brunnen, from where you have to fly over the lake…
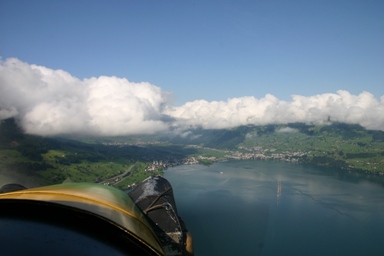
…and the approach to the airport, which is located just below the clouds in the middle of the picture.
As the shores of the lake are quite steep there are not really many emergency landing possibilities, but maybe the roof of this motor boat could serve as an aircraft carrier…

After flying the right hand downwind significantly below the published circuit height due to the clouds we turned around the village of Stans on the final to runway 07L.
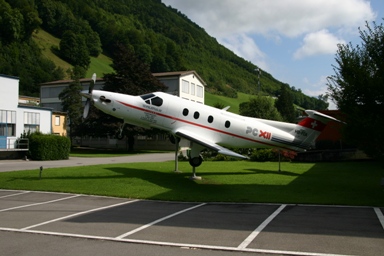
Pilatus Aircraft was so kind to offer tours of their factory to the EAS members and their guests, an opportunity which we of course could not resist. For those who think they have already seen these building, it is the location where part of the James Bond movie Goldfinger was shoot. Here a picture of the PC-12 prototype, if you look closer you can see “Experimental” written on the side. The Pilatus representative who gave the introduction pointed out that Pilatus is the largest plane builder of Switzerland, but the Experimental Aviation builders come in second. Well, there aren’t any others… I was amazed that we were allowed to take as many pictures as we wanted during the tour, even inside all the manufacturing and assembly buildings, they just ask you to get permission from them before publishing any pictures, even on a private website. Many builders of metal planes where surprised that manufacturing of a PC-12 is not much different from their projects, Pilatus just has better equipped workshops and they require more clecos per plane…
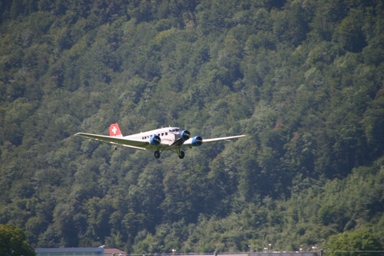
The arrival of the homebuilts was interrupted by a fly-by of one of the former Swiss Air Force Junkers Ju-52, which is operated by Ju-Air for sight seeing flights since more than 25 years. These planes are now 69 years old and still operate on most weekends. I read that they converted them to unleaded automotive fuel, so I wonder why this is not possible for all those standard Lycomings or Continentals.
Some of the visiting foreigners, such as the Europa builders from the UK who attend every year, took the opportunity of the clearing weather to do some sightseeing flights into the mountains.
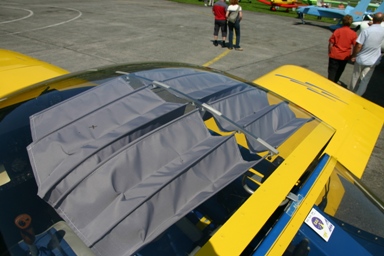
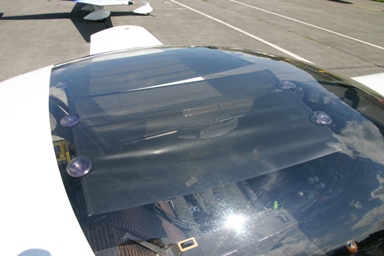
I took the opportunity to have a closer look at all the different homebuilts to see whether I can find some ideas that I could still include into my project. Below two solutions how to cope with the sun under large canopies, something I might also have to do for the SportCruiser. The upper one is quite an elaborate solution with custom made shades sliding on a rail glued to the canopy, the lower one just uses car sun shades as they can be bought at any gas station.
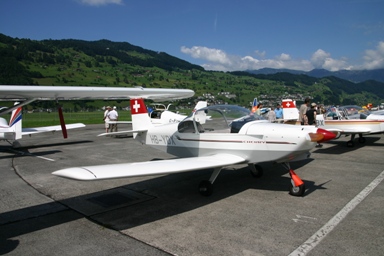
The line-up and variety of planes was quite impressive, with around 40 homebuilts and a number of vintage aircraft attending the meeting. The number of foreigners visiting seemed lower than in other years, which was probably due to the poor weather during the last few days. Non the less there were aircraft from Italy, France, Germany and the UK.
Later in the afternoon we prepared for the flight back to Lommis, which took about one hour. As I did the flying I could not take any pictures.
16.08.2008: Yeah, building continues. Today I finished installing two additional fluorescent lamps in my garage, amazing the difference it makes. I then started with the central console in the cockpit. The assembly is straight forward, everything more or less falls into place.
Here some before…
…and after pictures:
I realised that before I rivet everything I have to figure out which parts will be covered with the interior lining and which ones have to be painted. Here two pictures of the SportCruiser of Urs, which show me how everything should look in the end.
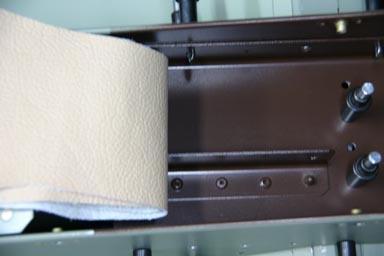
I also took pictures of all leather pieces that came with the seats to see which ones go where. Another puzzle to solve…
19.08.2008: Today I had to go to Brussels, which means no building in the evening, as I returned quite late. I did however continue to look into the panel/avionics issues, as this slowly becomes quite pressing. The big open question is whether we should go for an 8,33 kHz radio, or still install one with 25 kHz channel spacing, and whether we want a NAV receiver.
Only Filser, ICOM or Garmin currently manufacture 8.33 kHz radios. Filser and ICOM do not manufacture any NAV receivers, however, and the only option from Garmin is the GNS 430W. I’d love to install one of those, but the cheapest price I could find on the internet is 7995 $…. I do not like the Filser radio, so the only alternative is to install an ICOM 210, which sells for 1145 $, but then there is no VOR. One solution would be a Garmin SL40 NAV/COM, which only has 25 kHz channel spacing, and an ICOM A210 radio, or make provisions to install the ICOM at a later stage. Decision, decision…
Mode-S is set, at it is now a legal requirement for newly registered planes, with a mandate to convert existing planes expected in the next few years. As far as I see it now it will either be one from Becker of Garmin, the choice will probably depend on what we use as radio.
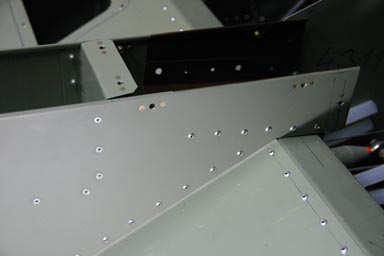
23.08.2008: Another busy week at the office, but at least today I managed to spend some time on the project. I started installing the glare shield. I could not find detailed information on any of the supplied drawings on how it is installed, but after some trying it just became obvious.
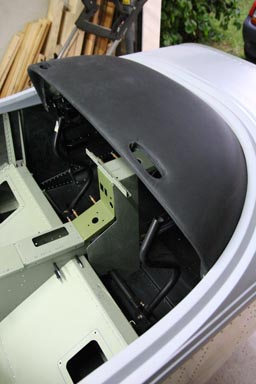
The two holes in the glare shield are handholds, which make entry into the plane easier.
Here a view from the co-pilot’s position. I wanted to install the panel too, but I could not find out which screws are used to mount it to the glare shield. None of the supplied drawings contains that information, so I posted a question on the Yahoo forum.

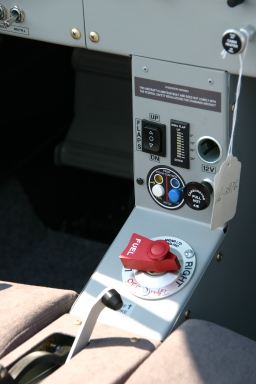
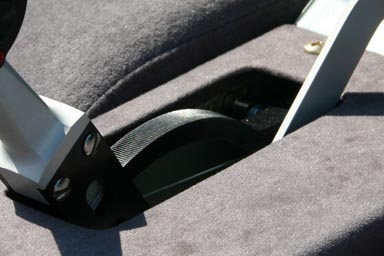
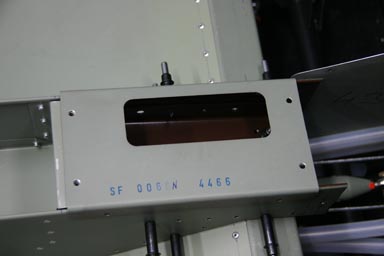
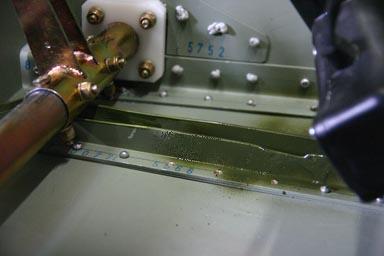
I also bought some paint to paint those hidden parts that should not, but can be seen. I know this is cosmetics, but I want it to look nice. One example is the throttle well, as on the picture below, where the green anti corrosion paint can be seen. I will paint this with a dark brown, which matches the leather color.
24.08.2008: After going hiking in the mountains for a few hours I decided that I still needed some building… First I painted the parts that will be visible below the throttle. Thanks to the nice weather I could do it in the garden, which means I don’t have to cover anything except the table. Here the result of my effort:
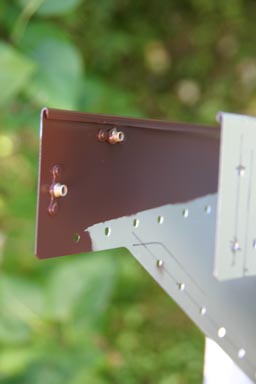
Of course I only paint the sections of the parts which will be visible to save weight. I removed the masking tape before taking the picture.
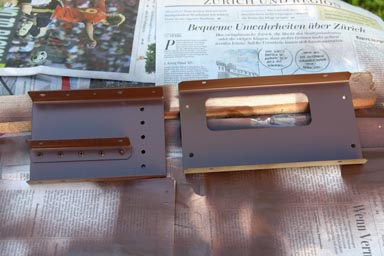
Here two more pieces the left one is the base to which the throttle is mounted, the right one is the top cover, see from below. The top side will be covered with the same leather as the seats.
Here everything assembled…
and here an attempt to show the leather together with the color I am using. It does not really show well on the picture, in reality it is a perfect match.
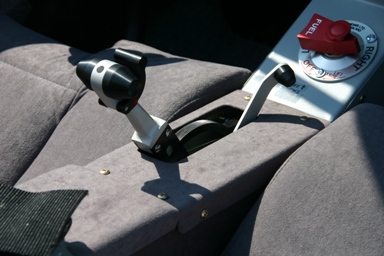
After that I started assembling the throttle.
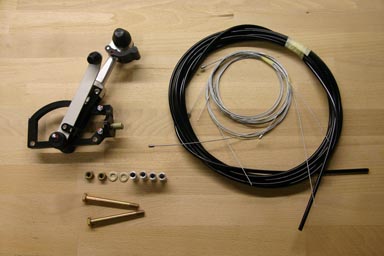
It took me again some time to interpret the drawings, parts lists etc., but finally I think I got it right. There are four cables, two each per carburetor for throttle and chock.

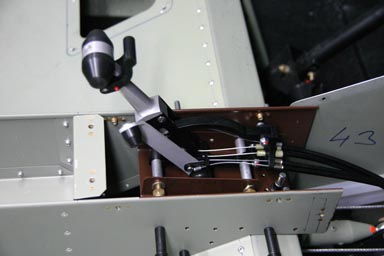
Here the throttle assembled temporarily…
… and here everything riveted. I had to use the hand riveter, as it is difficult to get to some of the locations and I don’t have a compressor in my garage (yet…).
26.08.2008: Today I continued riveting (by hand!) the console. Once I was finished I could not resist putting one of the seats in, just to see what it will look like…
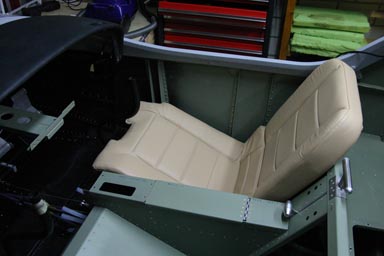
Cool….
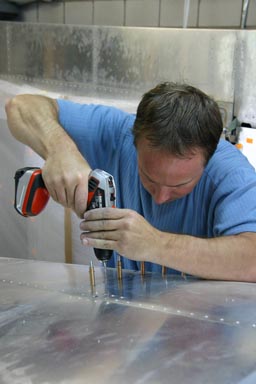
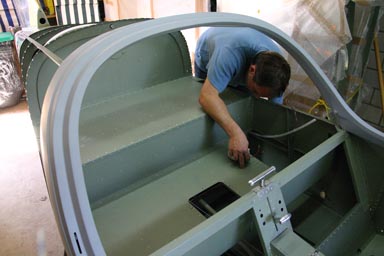
28.08.2008: Rolf and I are trying to build at least one full day per week, and today was one of them. In the morning we went to Kuerzi Avionics to discuss possible Avionics sets for our plane. After that Rolf started drilling out the temporary rivets that hold the upper skin on the fuselage, it has been temporarily installed just for transporting the plane from the factory to Switzerland. We have to remove it to finish some internal installation work, as well as to allow our “inspector” to check the interior before we close the fuselage again.
During that time I finished the throttle assembly by safety wiring the throttle cables as specified in the installation manual.

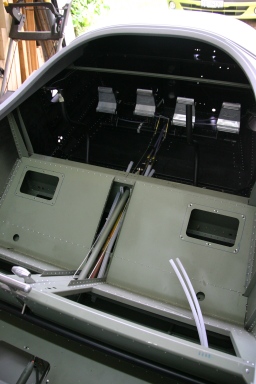
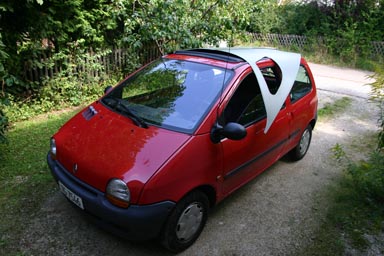
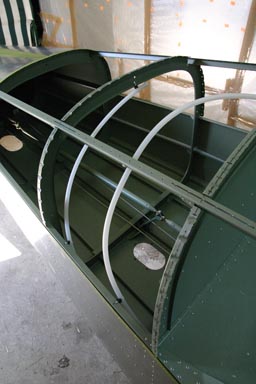
Once Rolf had drilled out all the temporary rivets we removed the upper fuselage skin. Not having a good place to put it we just laid it across the car in front of the garage (my mothers Twingo)…. We actually considered riveting it to the car for more permanent storage, but finally decided not to so… We then spent another hour or so to debur all the holes and then another hour to vacuum the inside of the fuselage.
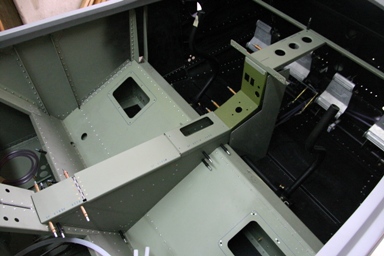
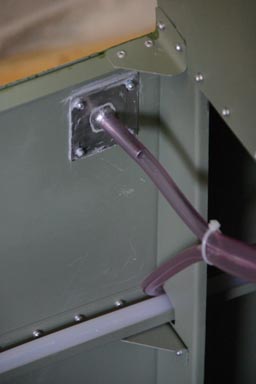
Below the fuselage without the top skin. Access to the interior is definitely much easier like that. Not much is to do in the back fuselage, as the push rods are already installed. All we will have to do is to install the NAV/COM antennas and wire them to the panel, but even that is straight forward as the holes for the antennas are already drilled and cable conduits fitted (the two white tubes visible on the picture below).
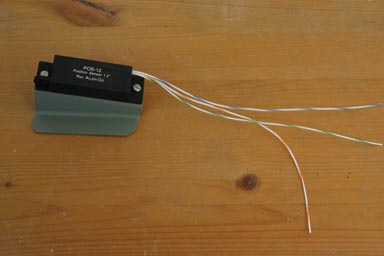
Next we started installing the flap position sensor. The sensor is a standard Ray Allen type, mounted to a small bracket which is to be placed underneath the flap motor.
Below the flap motor, which we had to partly remove to be able to install the sensor.
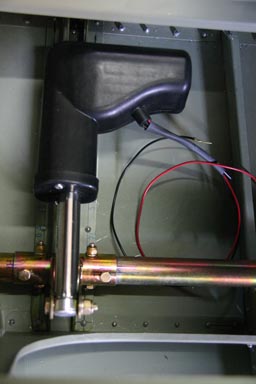
The sensor gets in conflict with one of the two beams holding the flap motor. This can even be seen on the drawing supplied by CZAW !?! We decided to trim the beam a bit (approximately 2 mm), but only after checking carefully that it does not have any structural purpose.
When checking the cable conduits I saw that two static ports are fitted, so I can tick off the alternate static port from my list.
30.08.2008: I spent some time yesterday evening and today preparing the schematics for the electrical system. We are however still not decided which avionics to put into the panel, and before we have done that I cant finish the schematics, cut the panel, paint the panel etc. To paint the panel we also have to decide on the color scheme… A lot of decisions to be taken quickly, as many things depend on them.