02.06.2010: Today I spent a lot of time drawing all the placards that have to be on the plane, such as “NO STEP” on the wings, “NO PUSH” on the ailerons, fuel and oil type markings etc. I first printed them on paper and put them where they should go to check whether they fit nicely and also whether I had all of them. From that I made two PDF’s which will go to the print-shop to make the real ones.
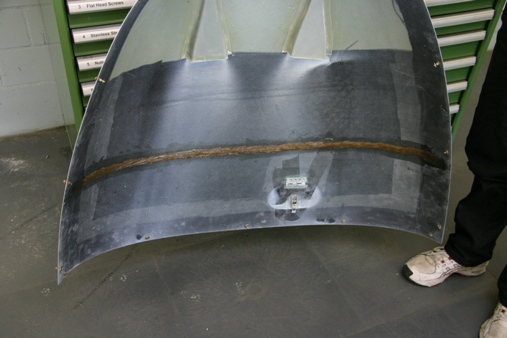
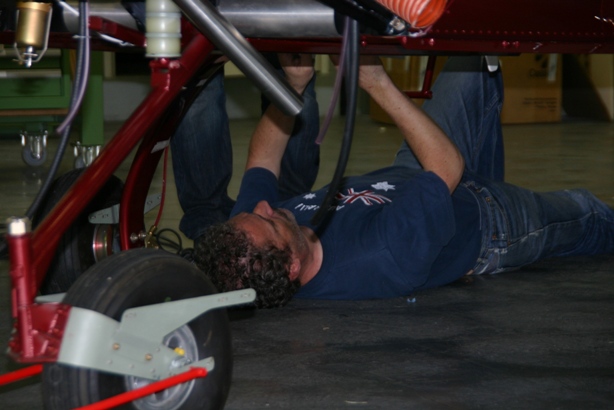
04.06.2010: We spend another day at the airport finishing some more of the smaller open issues. One of them was to add a reinforcement to the upper cowling, as it is quite soft even when installed and some cowlings have already developed cracks due to that. Below a picture of the first step, which was adding a bundle of fibres with some epoxy. They will later be covered by a layer of cloth, creating a reinforcement bar. Unfortunately we underestimated the heat that the epoxy reaction creates, so the reinforcement shows through on the upper surface, which is already painted. We will therefore have to paint it again, but that is not a major issue. We still have some paint left, and that allowed us to do some trimming on some of the edges, with the result that the cowling fits better now.
We also started looking at the upholstery. The upholsterer that does all the work on the planes of the club came to have a look and gave us some tips with what to start. He will come for half a day or so next week to help us with the more critical pieces to ensure that it does look nice.
We then put the left wing on the wing stands to put the registration on and to install the pitot. It nearly looks on the picture as if we had put the wing onto the plane the wrong way round…
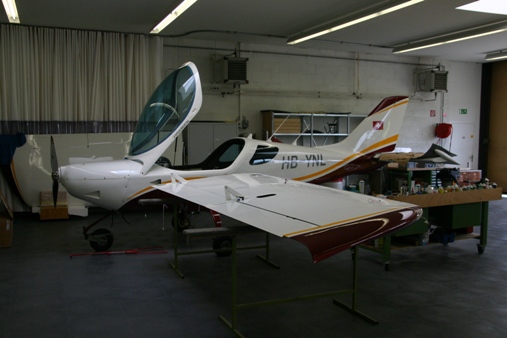
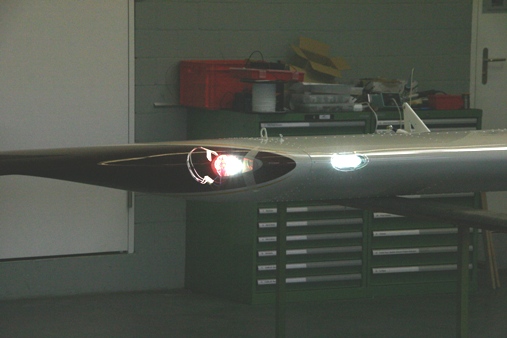
That gave us the opportunity to test all the light and they are indeed very bright. It does not show well on the picture, but they definitely look brighter than the standard units on the factory built plane.
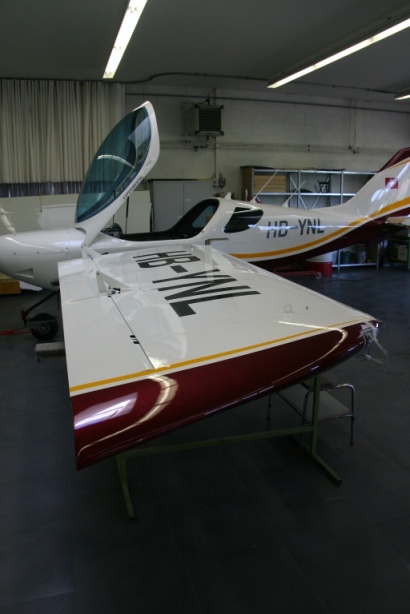
Here the registration as put on the wing. The letters have to be 50 cm tall, which is quite huge for the SportCruiser wing.
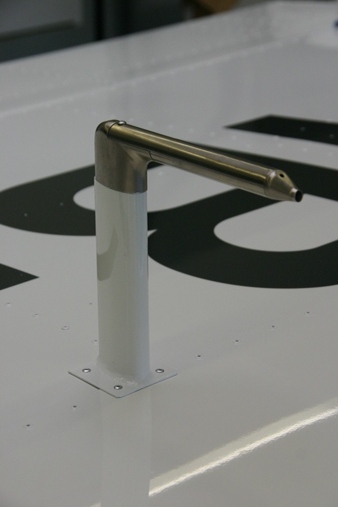
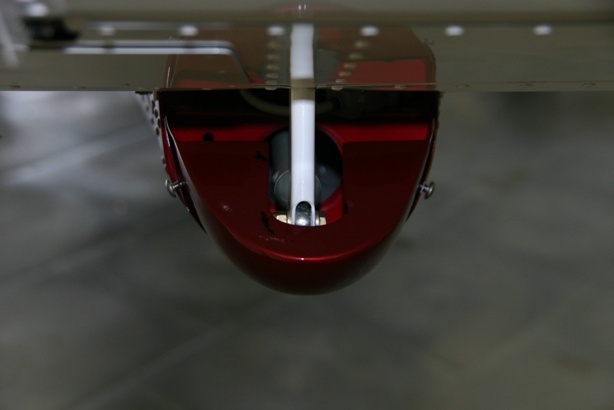
We also installed the pitot. We are using the heated pitot from Dynon, as I am still hoping to one day get a night VFR approval, for which this is required. It also has the advantage to provide angle of attack information due to the second small hole that can be seen on the picture below. That gives us stall warning information without having to install a separate switch. We of course tested the heating element first before riveting it to the wing, as access to the connectors will only be possible by drilling out the four rivets.
Below the call sign on the wing.

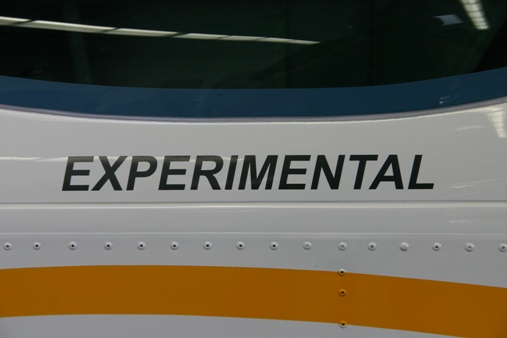
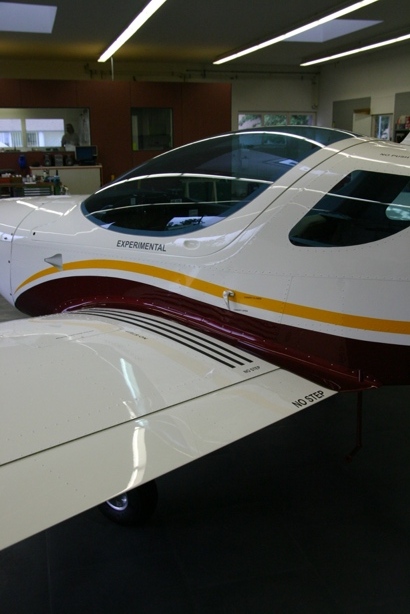
Finally we also put the EXPERIMENTAL sticker onto the canopy frame. All the placards on the outside will be anthracite and italic, which gives the plane kind of a “design” look.
I also started diving deeper into the papers that have to be finished for the final inspection, that’s going to take another few hours….
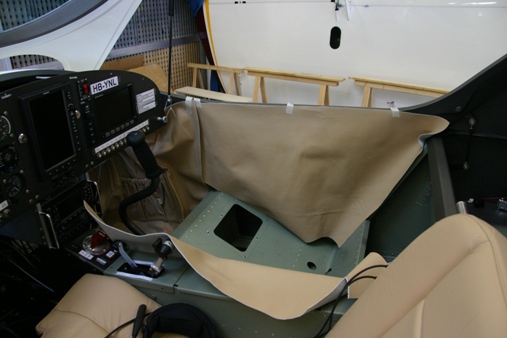
09.06.2010: Today I started attacking the last big open item, the upholstery. First of all I had however to lay all the cables and tubing permanently that disappear behind the upholstery on the sides of the cockpit. The trickiest one was the cable from the FLARM antenna which sits on top of the fuselage just behind the canopy frame. I ran the cable along the frame down to the canopy lock area.
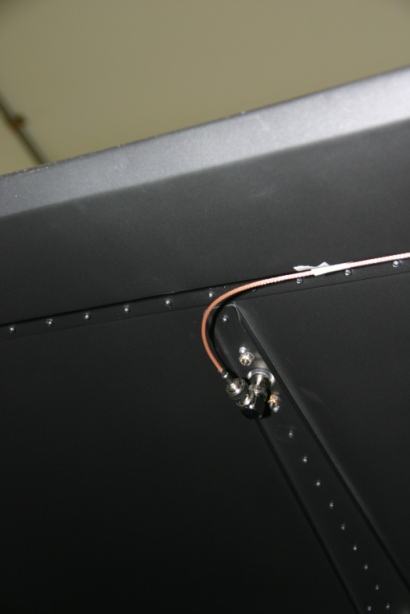
Instead of going in front past the canopy frame, where the cable would have been visible, I ran it underneath the frame through two holes, fitted with grommets.
I cut a groove into the rear side of the foam and ran the cable through it, protected by some tubing that I still had. Like that I could replace the cable if ever needed, the main reason is however that the cable is protected when leaning or pushing against the upholstery.
I then installed all the foam pieces as shown below.

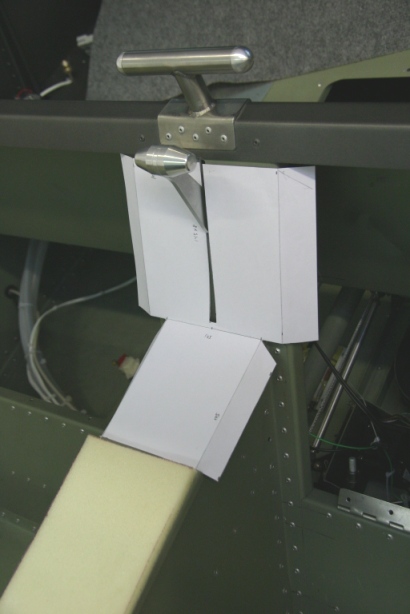
Next I started making paper templates for the more complex leather pieces to see how big they have to be and how to cut the material.
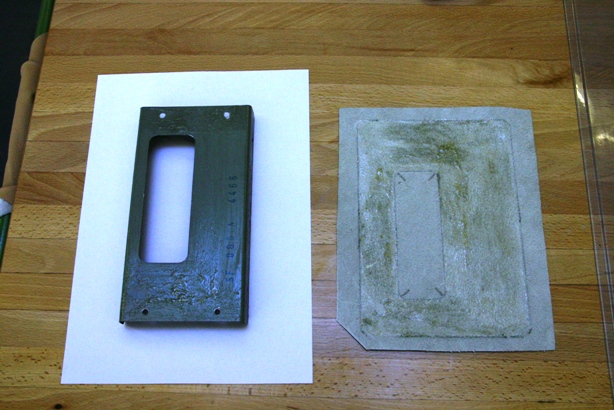
I then started with covering the throttle cover, as it is a fairly simple piece, and one that can be done on the workbench as it is removable. I removed the one from our factory built plane to see how it is done. Below the first step of adding contact glue to the metal cover as well as the leather piece…
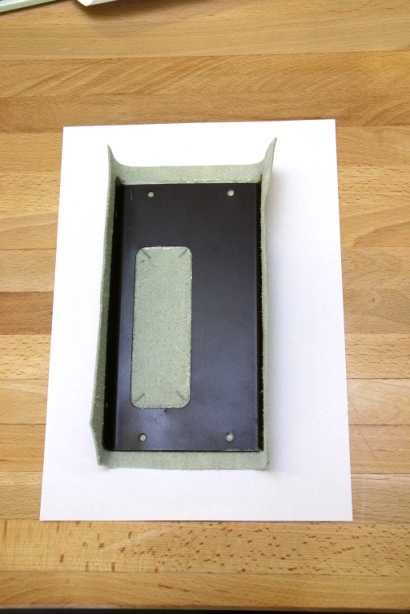
…and the putting them together after 10 minutes.
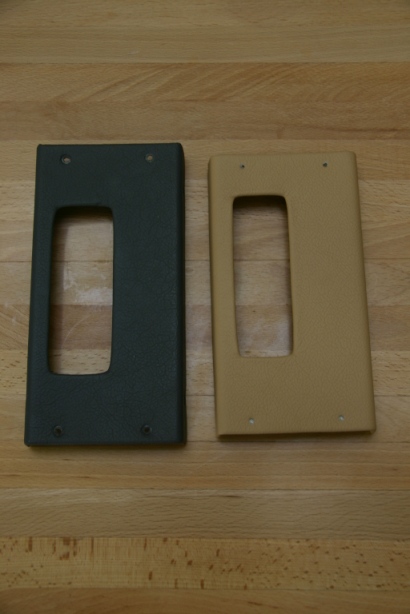
10.06.2010: Today I continued with the throttle cover. Below the result, the right one if for our plane, the left one from the factory built model. They seem to have done some design changes, as the newer one is about 2 cm longer.
I then put on some more of the placards. They are all in anthracite colour, like the call sigh, and italic too.
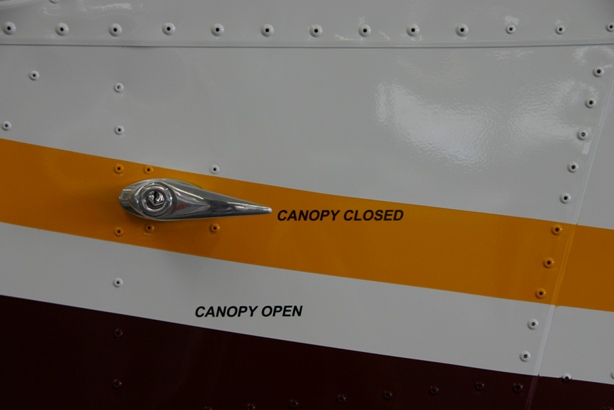
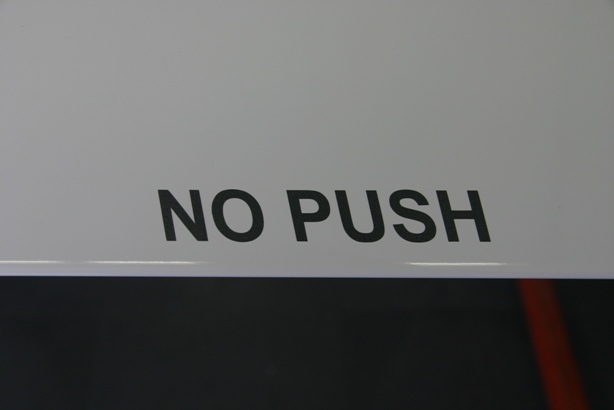
On the left side they are tilted to the right, on the right side to the left. On the elevator there are two “NO PUSH” markings near the left and right tip, so the left one is tilted right….
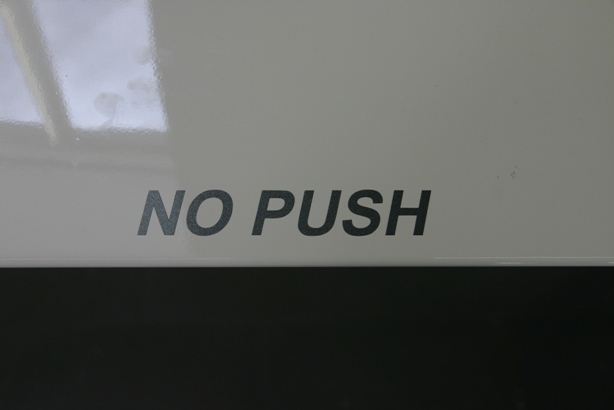
…and the right one tiled left…
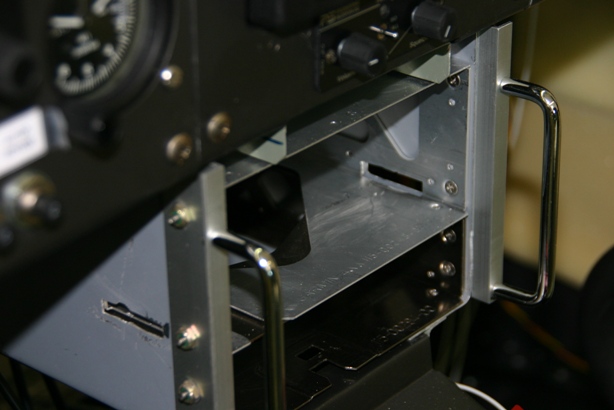
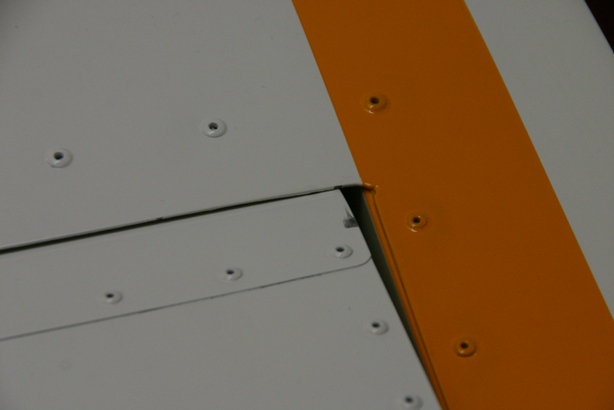
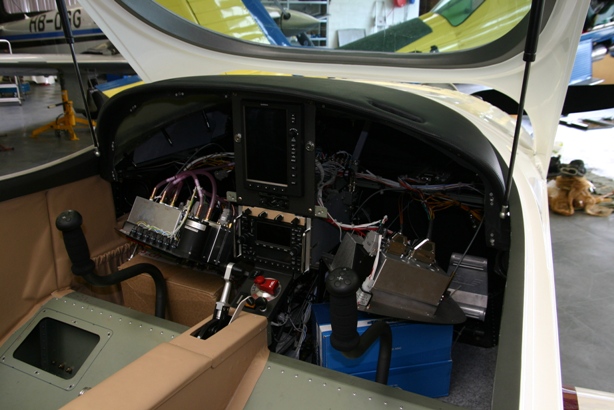
When sliding the GNS430 into it’s rack some days ago I noticed that it has a small ventilator with an air outlet at the bottom of the unit through a channel which lets the air escape on both sides when it is stacked on top of something else. Also the Garmin supplied mounting rack has two slots to let the air out, but they have been covered in our installation by the side walls of the console. Not to get problems with that I decided to cut two slots into the console walls which align with the ones in the mounting rack. They can be seen in the picture below. I will later cover the sides of the console with leather, but I will make cuts into it not to close the slots.
Rolf spent the day making a small panel that will cover the slot above the GNS 430 and below the central part of the panel. Into it we will mount four potentiometers to control audio volumes as well as instrument illumination. I am not yet decided whether to paint that cover in the same colour as the panel or whether to cover it with leather or something else to give the panel a designers touch. We will see.
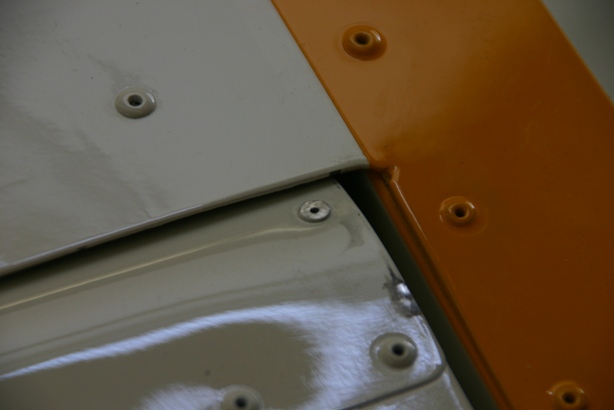
11.06.2010: Today I initially intended to start with the bigger pieces of the upholstery, but the upholsterer that will help me could not come, so instead I did a lot of smaller items that are still to be finished. One of them was with the wing lockers. They are closed with the fasteners shown below (picture taken earlier when painting them).
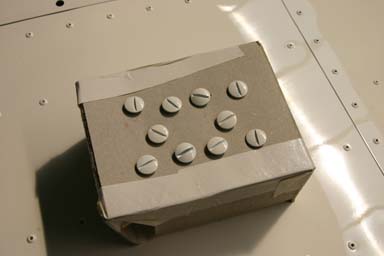
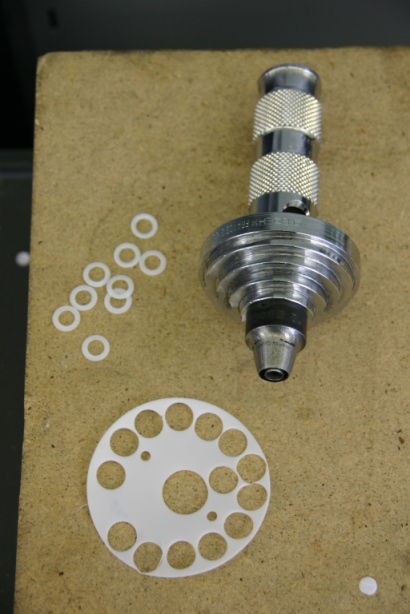
The fasteners fall off when the locker door is open, so they would probably get lost quickly. To prevent this they are secured on the factory built plane with small plastic disks on the inside of the door, but the disks were somehow not supplies with the kit. I asked Silvan how I could make them myself and he came up with a cool tool to make seals, as well as some spare plastic sheet. The tool contains a set of ring shaped knifes that can be attached to a holder to produce any diameter of ring from 5 mm to about 60 mm diameter, it also cuts the inner hole at the same time. You just have to place the tool onto the plastic sheet and give it a knock with a hammer. I took measure from the rings on the factory plane and made some with a similar size (12 mm outer and 7 mm inner diameter).
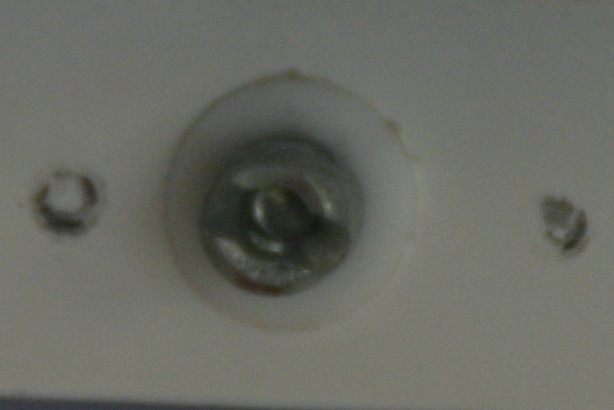
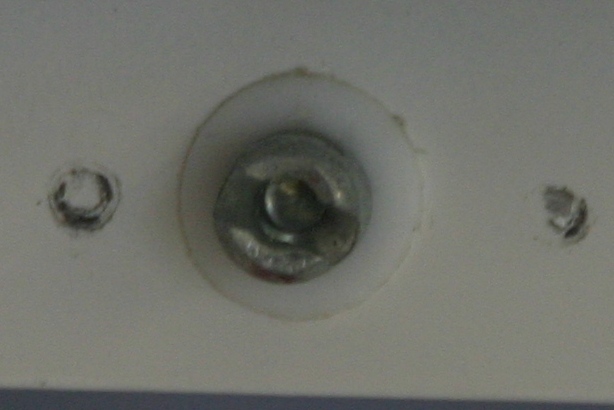
Below two pictures take from the rings installed on the factory plane (above) and on mine (below). The fasteners hold well enough now so that I don’t have to fear that they get lost every time I open the lockers.
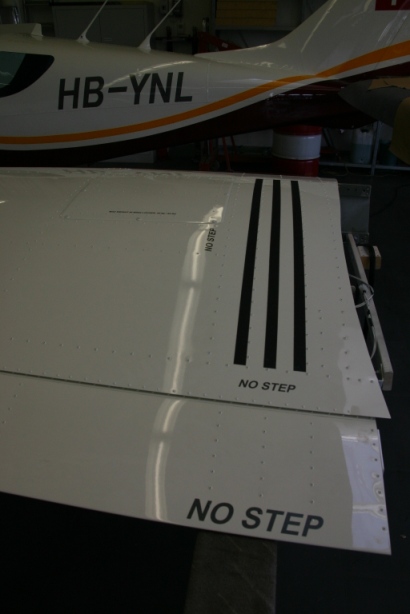
I then added the last placards as well as the anti skid stripes to the left wing. I will still add red stripes on the flap above the NO STEP sign just to make it clear to passengers where they really should not step.
Next I finished tying all the cable bundles together and attaching them so they don’t move when flying and can’t rub against anything. That included running all the audio cables to the panel where we will still add four potentiometers to control NAV, Audio and FLARM tones, respective alerts, as well as instrument brightness.
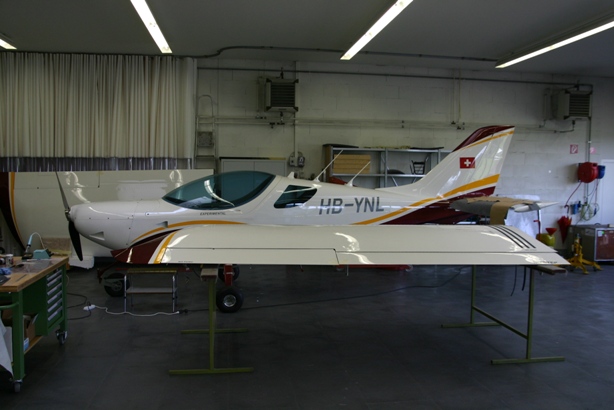
Here a picture of the fuselage with the cowling installed, it does start looking like a plane. Next week we will install the wings as soon as the upholstery is completed, as it’s just easier to do it with the wings off.
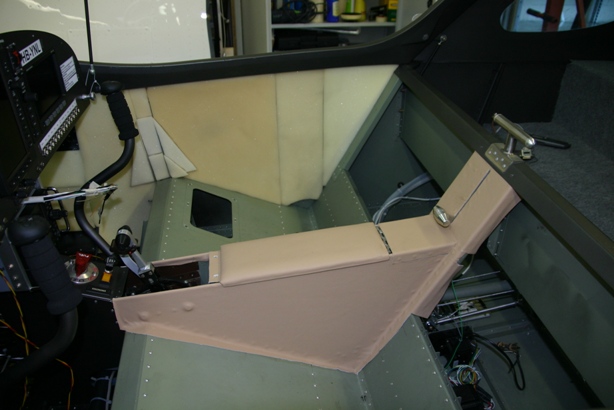
14.06.2010: I continued finishing the wiring behind the panel, especially to tie-wrap the cable bundles so that they cant rub against anything. I also spend some time on the strobe covers. After lunch the upholsterer came and we started with the centre console. Below the result of two hours of work, not bad.
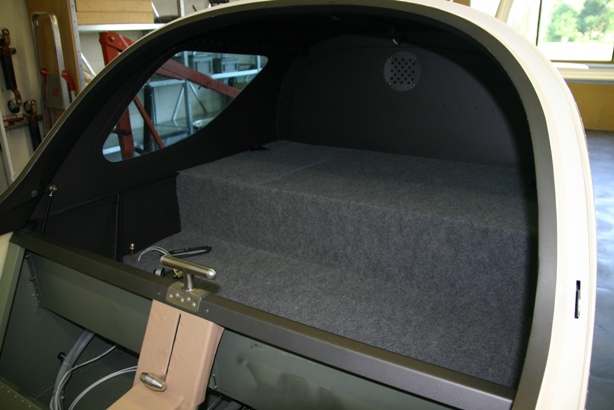
Next we installed the carpet in the baggage compartment. We did that using a contact glue that comes in a spray can. That really goes much quicker than with the traditional type of contact glue that has to be hand-applied with a brush.
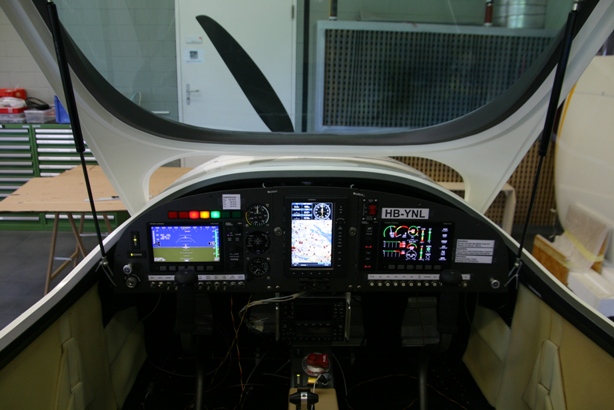
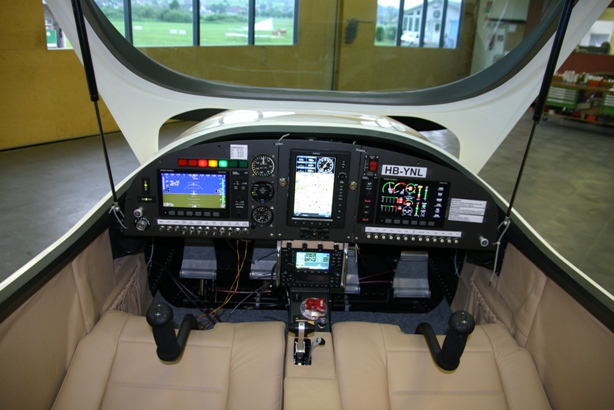
Below a quick check of the panel after finishing bundling all the wires, just to be sure everything still works. We will still install four potentiometers above the GNS430, and I still need the special connector used on the GPSMAP 695 to connect power as well as the serial interface, but that’s it. We can soon install the panel cover.
Tomorrow we will finish the upholstery, after that we can put the wings on. If everything goes well we can do some of the rigging checks and maybe also the weighting still this week.
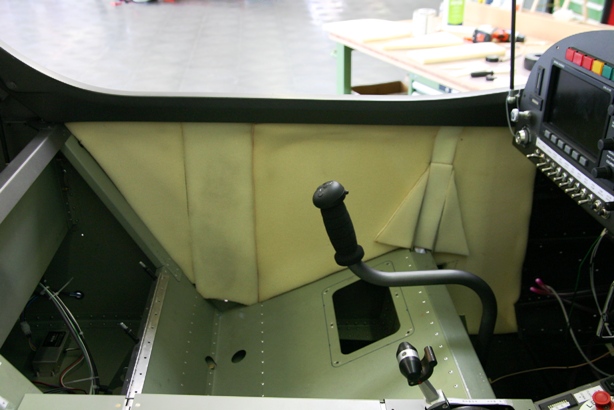
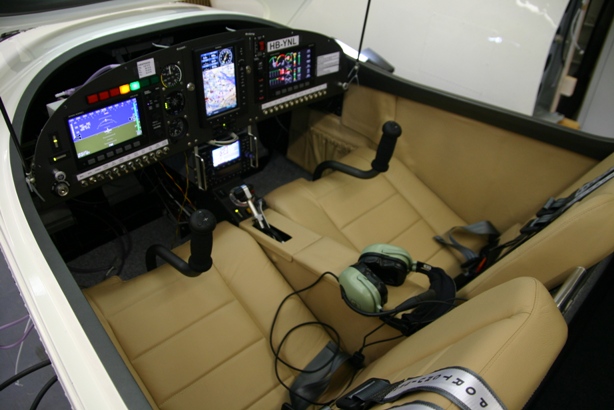
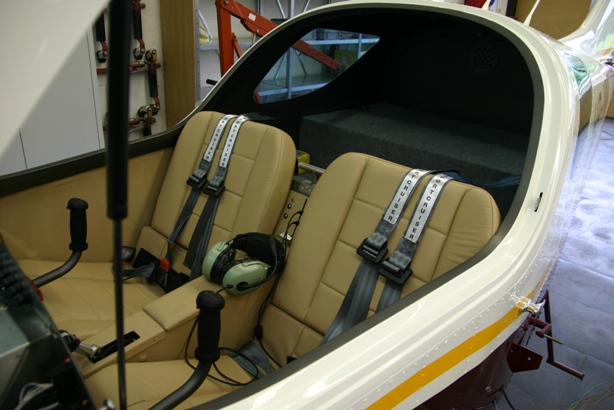
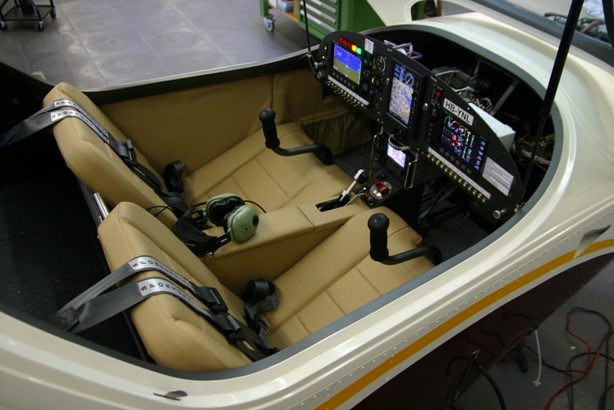
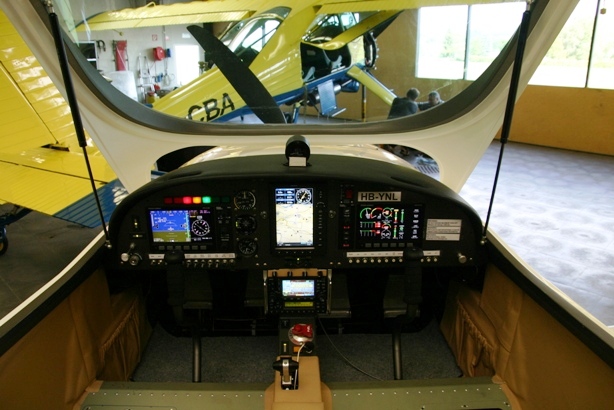
15.06.2010: I finished the upholstery today! It really looks the way I wanted it, kind of luxurious. Below a few shots of the cockpit, I even already installed the carpets on the floor. There are only two things still missing. One is the glare shield above the panel, but I will only install that one once everything else is done as it can’t be removed afterwards and makes access to many items behind the panel more difficult. The other one is the small panel above the GNS 430 to hold the audio volume potentiometres. I am still looking for a nice piece of wood which I could use there, like in a BMW or a Jaguar, or I might cover it with leather instead.
Tomorrow we can definitely put the wings on.
16.06.2010: We started preparing the wing installation today. First we cleaned the tanks by washing them with fuel. Below we were checking for any dirt, but there wasn’t any.
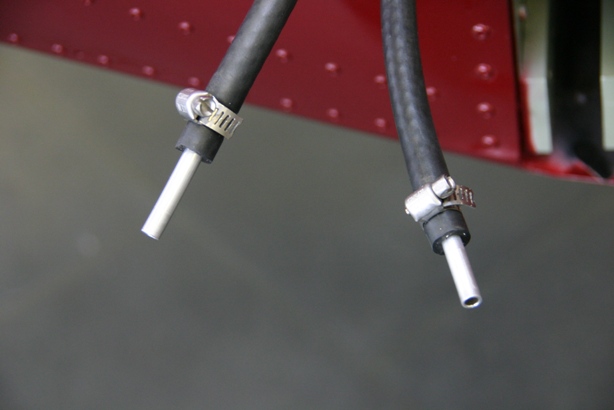
We then put the wings next to the fuselage and started attaching the electrical cables as well as the fuel lines. There were some plastic fitting for the fuel lines, but Rotax does not recommend using them as they seem to become brittle after only one or two years. We therefore used small sections of aluminum fuel line, as shown below.
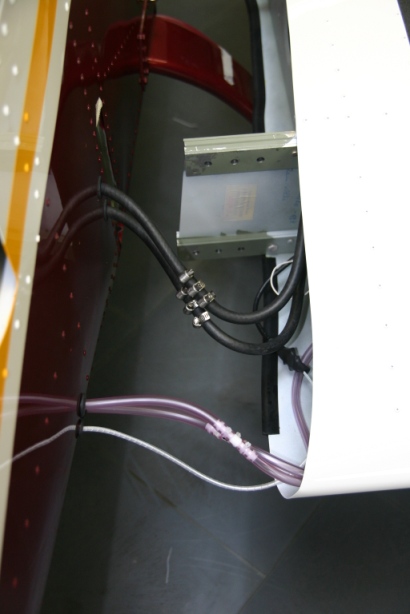
Below a picture of all the connections, taken just before mounting the wing.
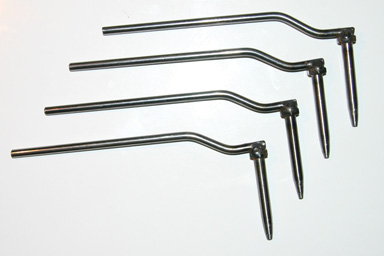
To temporarily mount the wings we used the pins we made about a year ago.
I then put the screws into the main spar, and also added the single screw that holds the rear spar. That screw is mounted with the head facing rearwards according to the plans, which is strange as it is first of all contrary to the general rule, but you also can’t see the nut during the preflight check. As we has already installed it the other way round we let it the way we did it.
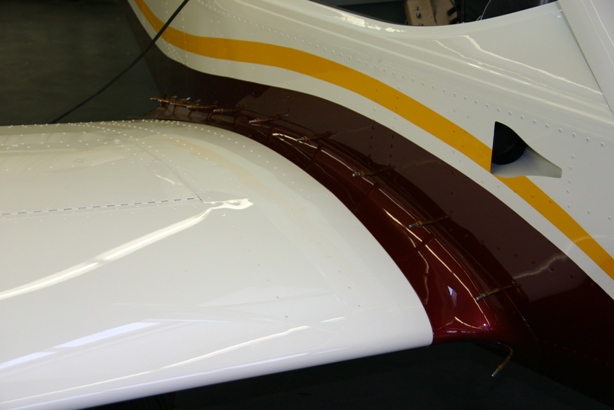
Next I attached the wing fairings. I also added the adhesive tape that prevents the wing fairing from scratching the wing when it moves during flight.
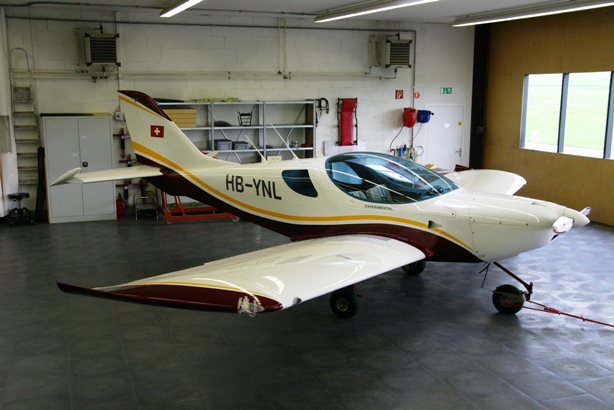
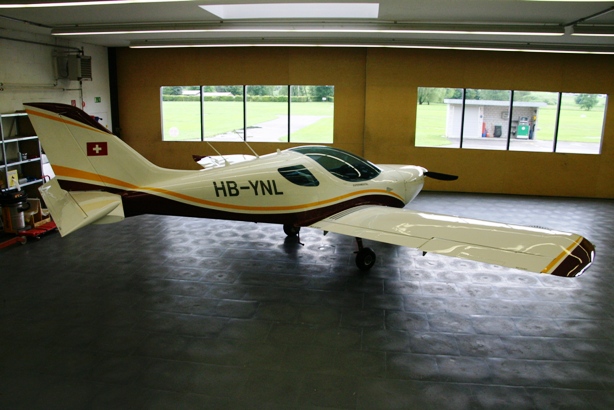
Here the first picture of the fully assembled plane.
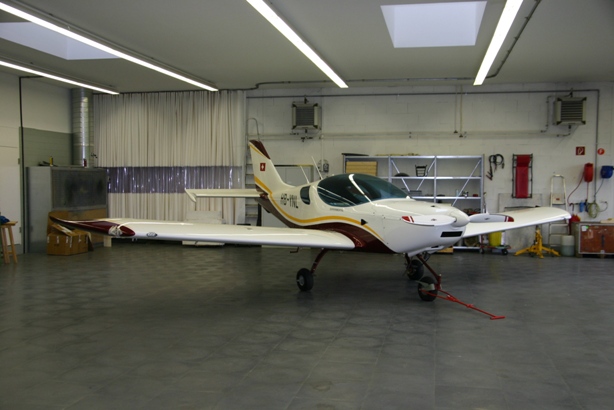
Here another picture take from a bit higher. Tomorrow I will add the rest of the placards and the anti skid stripes to the right wing.

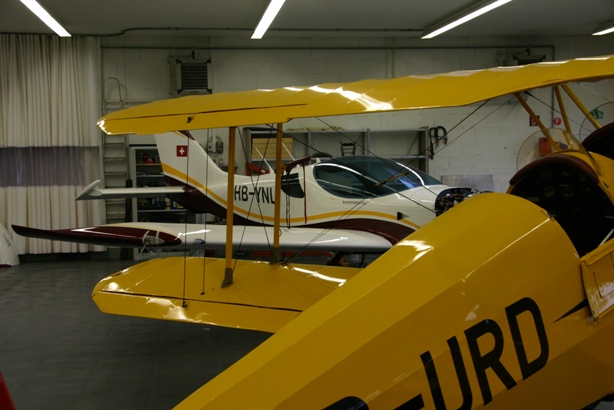
Here a nice “old meets new” picture taken in our workshop, where there is currently a Bücker for a 100 h check.
17.06.2010: The first thing I did this morning was to install the anti skid stripes and the placards on the right wing. I then finished installing the 12 bolts that hold the wings. They are not that easily accessible, so that took quite some time. Next we finished filling the engine oil. We had troubles getting the engine to “gurgle”, until we found out that the spark plugs have to be installed to get that effect. Without them it is easier to turn the engine, but no pressure builds up inside the engine to push the oil back to the reservoir.
We also tested the starter by removing all spark plug caps and also the spark plugs. Like that the engine can be turned easily by the starter without risk of accidentally starting it.
Next we decided to put the beast onto the scales. Fortunately we could borrow the calibrated scales from the maintenance shop at another nearby airfield, so that the measurement will qualify for the certification. Below Silvan prepares the scales.
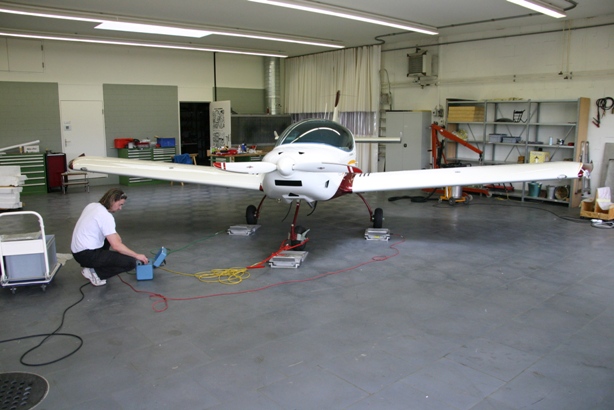
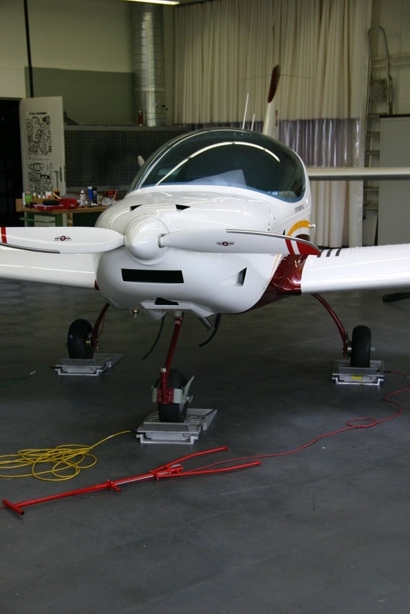
Below a picture of the plane on the scales. We had to do two measurements, and to move the plane down from the scales between the two measurements. The two measurements have to be within 1% for the result to be valid.
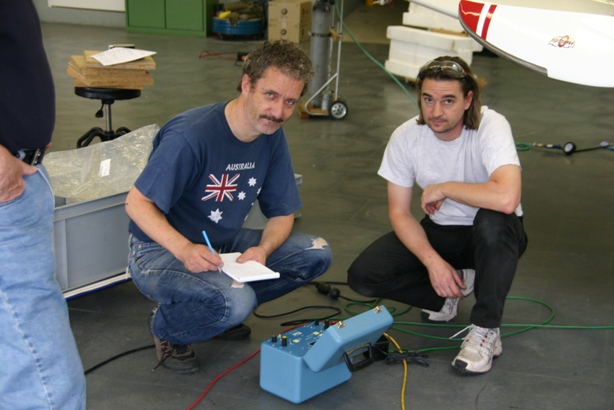
Below Silvan (right) and I are writing down the results. And they are very nice, the empty weight without the wheel pants is 366 kg. That’s better than I had hoped for, considering that we have installed quite a few of the options, such as leather seats, autopilot, heated pitot and avionics that include a GNS430W and a GTS330.
With that weight and an MTOW of 600 kg I can fly full fuel with my wife and still more than 10 kg of luggage. I am however still pursuing an increased MTOW of 630 kg, which would make things perfect as we could then take 40 kg of luggage, which is as much as when flying on an airliner…
And here two more pictures of the fully assembled plane.

The panel is also nearly finished, Rolf added the four potentiometres today to control the audio volumes.
18.06.2010: I started finishing the documentation today. I also spent some time on a number of smaller items that still have to be finished, such as fixing the brake lines to the gear legs, mounting the hinges to the seat backs etc. Later I took some more pictures from a bit higher up to better show what the finished plane looks like.
19.06.2010: I spent some more time this morning on the documentation, as I want to announce the plane for the final inspection as quickly as possible.
22.06.2010: I did some more of the small bits to be finished today. I started with the fibreglass tail cone, which had to be trimmed for the aileron horn to have sufficient clearance. Here a picture before…
…and after trimming.
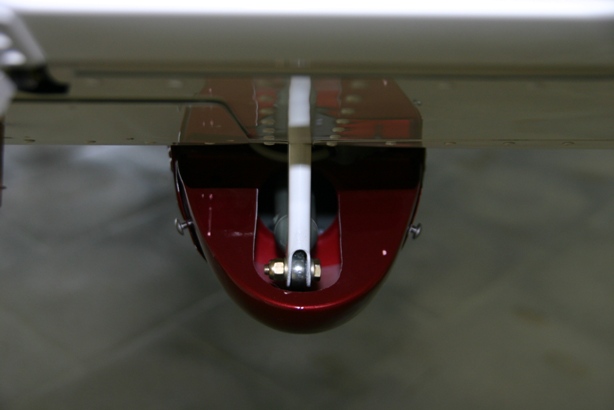
Then I tied up all the tubes that vent excess oil, fuel and coolant out of the engine compartment. I also filled the cooling system with 50/50 coolant. I am not using Evans NPG+, as it does not have any significant advantage over ordinary water/coolant mixture but a number of disadvantages. Silvan has a Rotax tool to verify whether the cooling system is not leaking, and it didn’t (see below).
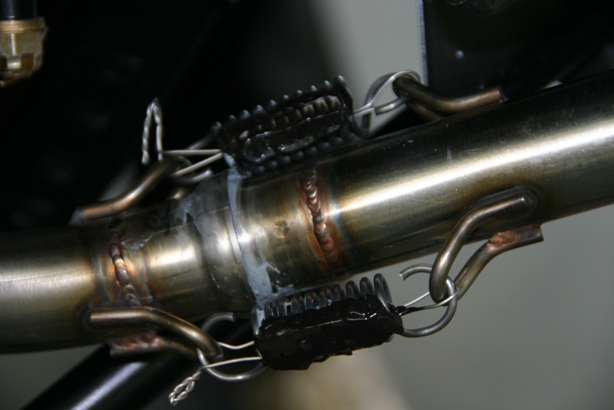
Next I checked all screws in the engine compartment to see whether they are tight and properly secured. I then greased all joints of the exhaust system and secured the springs with safety wire as shown on the picture below.
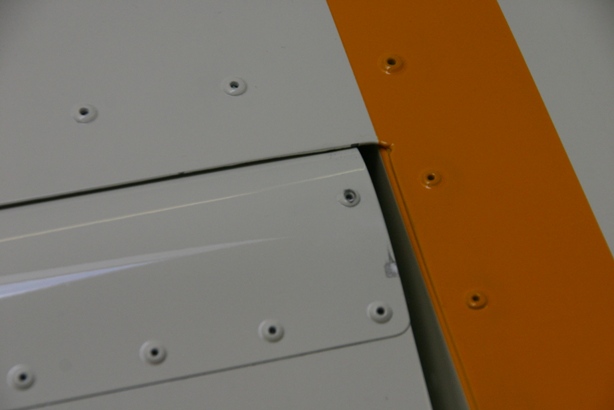
I started checking all rudder deflections and noticed that the right aileron has not enough clearance when deflected fully upwards. Below two pictures with down- and upwards deflection. The aileron touches the upper skin, as the scratched paint nicely proves. I will have to bend the rear spar a bit to give more clearance, but for that I need Rolf to help me as I have to remove the aileron.
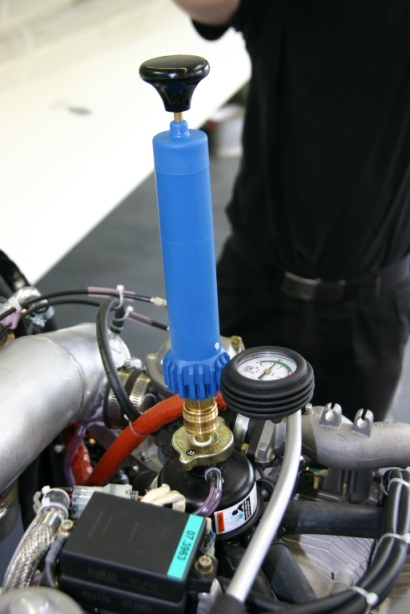
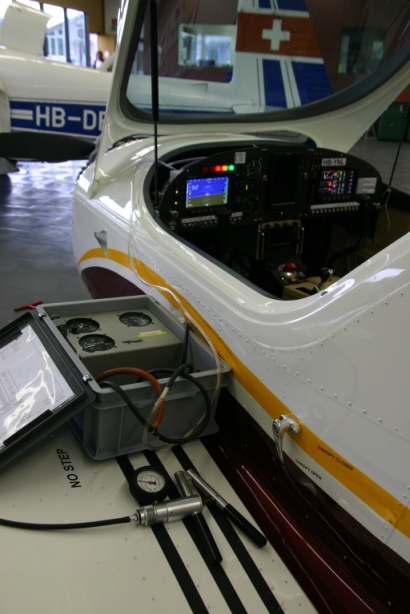
Finally I did the calibration check for the pitot and the static systems. On the picture below one can see the box Silvan has with a calibrated altimeter, variometer and air speed indicator as reference. On can pressurise either the pitot or the static system with some kind of pump (laying in front of the box) and then compare the reading of the calibrated instrument with the one in the plane. Both the Dynon and the analogue backup instruments (UMA ASI and Winter Altimeter) are surprisingly accurate, so everything was fine. We were just puzzled in the beginning as the static system had a leak, but then I noticed that the nipple on the Winter altimeter has a thinner diameter than the ones on all the other instruments, so the hose was just loose.
The best thing which happened today was however that the responsible engineer from the Swiss Experimental Aviation Association called me to tell me that my application to raise the MTOW to 630 kg has been approved!
Yeeeaaaaahhhhhhh!
He recalculated all loads and speeds for the higher weight based on the original engineering data from CZAW. He told me that the negative gust load is the load that has the smallest margin beyond the ultimate load, so VNO has to be reduced a bit for 630 kg. All other corners of the envelope however still have sufficient margin, even at the higher take off weight, so no need to reduce any of the other speeds (e.g. VA, VNE).
As a result my weight calculation now comes out as follows:
| Empty weight | 369 kg |
| Full Fuel | 80 kg |
| Pilot & Passenger | 140 kg |
| Baggage | 41 kg |
| Total | 630 kg |
That means that if I fly with my wife we can take 40 kg of baggage without having to worry about fuel quantity, or without getting into troubles if we run into a ramp check. Full fuel means that I can do round trips to places like Elba or Venice from my home base without having to refuel, which simplifies flight planning quite a bit especially on weekends. 40 kg of baggage means we can take camping gear with us, such as tent, sleeping bags, and mattresses, spare oil, tie down equipment and still a fairly heavy personal bag each.
The landing weight will remain at 600 kg, as he landing gear has only been calculated and tested to 600 kg. I have spoken to the manufacturer of the landing gear and he could make one even for 650 kg, but with the above figures I don’t need that. Even if I take off at exactly 630 kg, I am down to 600 kg after two hours of flight.
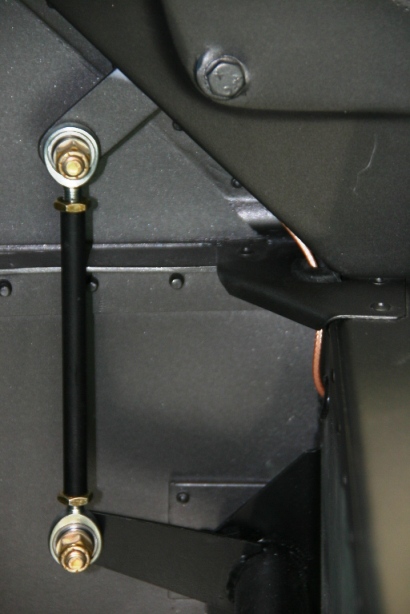
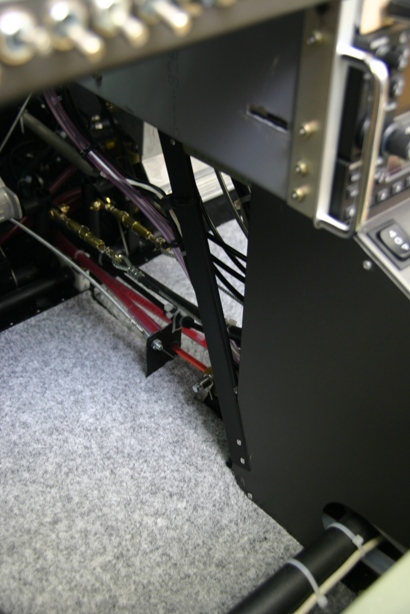
28.06.2010: Back at work. Today I finished the support of the centre console. The Garmin GNS430 and GTX330 are quite heavy, and as they are installed in the centre console instead of the centre section of the panel I can’t add the usual brackets that suspends the radio stack from the glare shield. Instead I added two brackets that support the rear part of the stack, the front sits on top of the console.
I guess tomorrow I can mount the glare shield, after that it will be time for the fuel tank calibration, engine run and the various measurements required by EAS (fuel flow, static thrust, tacho calibration etc.).
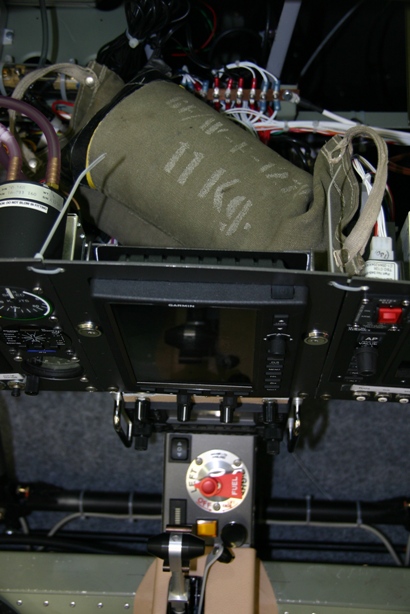
29.06.2010: I finished the documentation of the centre console yesterday evening, as I will have to get an approval from the EAS for this minor alteration. To be sure not to have lengthy discussions I made a short load test today. I put two 11 kg led bags on top of the radio stack, and even though the console was only standing on the floor (normally a big part of the load goes into the glare shield above) there was no problem at all (22 kg represents a 6 g load). I then produced a nice document for the approval of this minor alteration, which I will send to the EAS engineer.
Next Rolf and I corrected the minor clearance issue with the right aileron. We lifted the upper skin a bit, which would already have been enough, but also shortened the rivet head by about half a mm. The little scratch in the paint further back comes from moving the aileron way beyond the maximum deflection during installation, now that the push rods are connected the aileron never moves that far. I will paint it when I also paint the rivet head.
We then adjusted all the push rods and checked the maximum deflection of all the moving surfaces (flaps, ailerons, elevator, rudder and trim tabs). As always Silvan had the right tool, as shown below, so that went quite fast. We also measured the rigging of the plane according to the instructions of the EAS, two more documents finished.

Finally I also permanently installed the glare shield. It is riveted in place with about 30 or 40 rivets, so it will probably stay in it’s place forever…. The many rivets are needed as the glare shield carries the panel, and also has two grab handles which help when entering the cockpit. As can be seen below the panel sections can be lowered to give access to the rear side, as I made all cables and tubes long enough.
Once the glare shield was put in place I could permanently fix the panel, everything is much sturdier now. I also installed the magnetic compass on top of the glare shield, the lowest low tech instrument on the whole panel. I checked whether it deflects when switching on and off each electrical load, but it did not show any reaction even to the pitot heating (which draws 10 amps during warm up). Having run all cables sufficiently far away from the compass position is paying off.
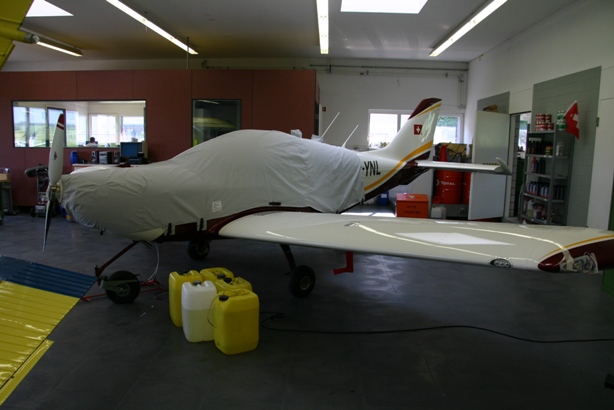
I will probably have to park my plane outside for some time until I get a place in the hangar, so I ordered an outside cover from Vertigo Covers in the UK. It arrived yesterday, and I of course had to check whether it fits. As can be seen on the pictures below it does, and it is really nicely made. The inside is covered with a special tissue to protect the canopy, and there are small flaps where the buckles close to make sure the buckles don’t not damage the paint of the plane. I also received the pitot cover and the two wing locker bags, but I did not yet try them. The cover for the propeller / spinner is still missing, but they told me that they how have found another SportCruiser with the same propeller to take measurements, so I should receive that one soon too.
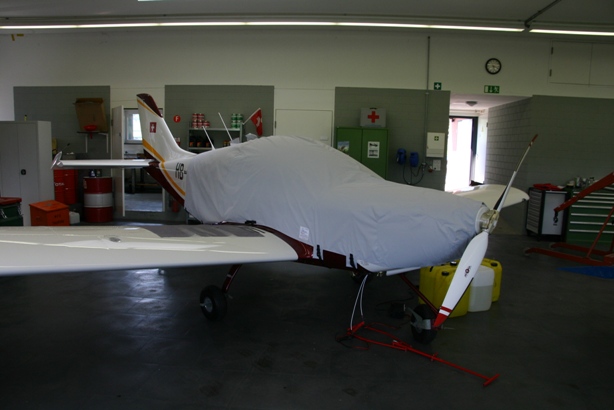
On this picture one can also see the 120 l of 95 ROZ automotive fuel I went to fetch today at the closest gas station from the airport, as we currently only have AVGAS in Lommis. The chain which runs the nearest gas station is called AVIA, I hope that is a good omen…. Tomorrow I will fill the tanks and at the same time calibrate the fuel sensors, and after that it will be time to start the engine.
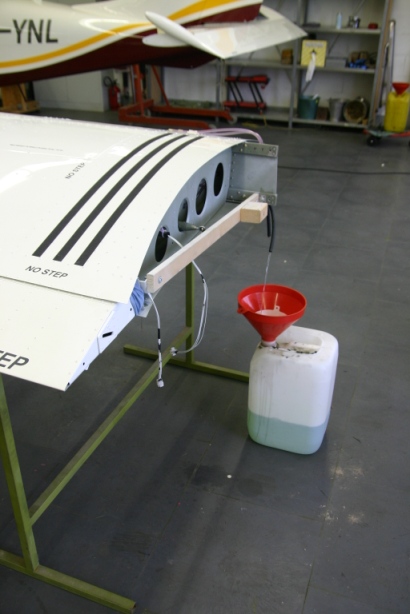
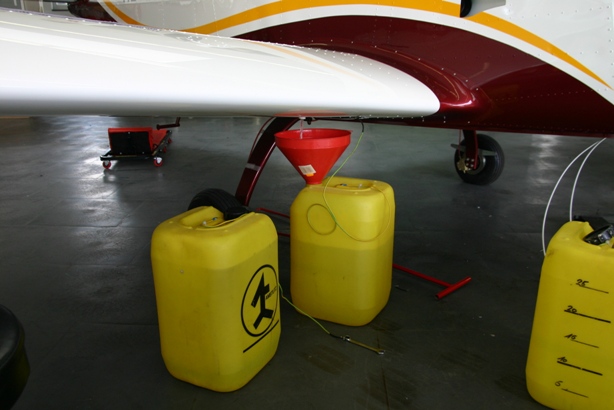
30.06.2010: I started this morning with calibrating the fuel tanks. After wondering why the sender in the tank did not indicate any change in fuel level and after searching for about an hour in the wiring I detected that I had crossed out the left and right signals between the auxiliaries board and the Dynon instrument…. That is probably the first error I have found in the wiring apart from the missing audio ground lead, and even though that’s not bad it still annoyed me. After correcting that the fuel senders worked fine. I then calibrated the fuel tanks by pouring 5 litres at a time into the tanks, each time acknowledging the step on the Dynon instrument.
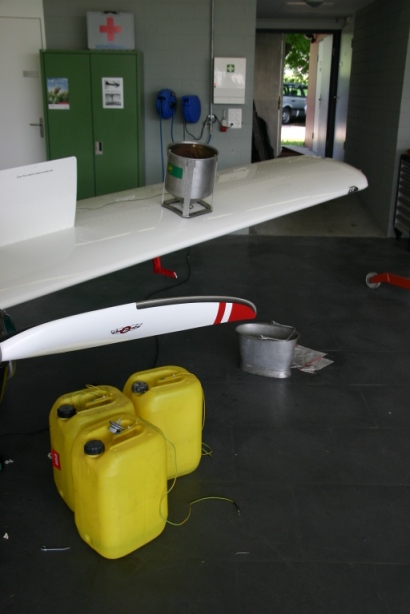
Unfortunately the instrument skipped one step on each side, so I have to do it again. That meant draining the 114 l of fuel back into the canisters. To do that quickly I removed the fuel drain on each side. After the whole procedure I was smelling like a fuel pump…
Later Urs came with his SportCruiser for some maintenance, and they suspected that his fuel pump was faulty, so my plane was suddenly without one… I will get a new one until Friday from Aircraft Spruce Europe. So the first engine run is postponed for some days.
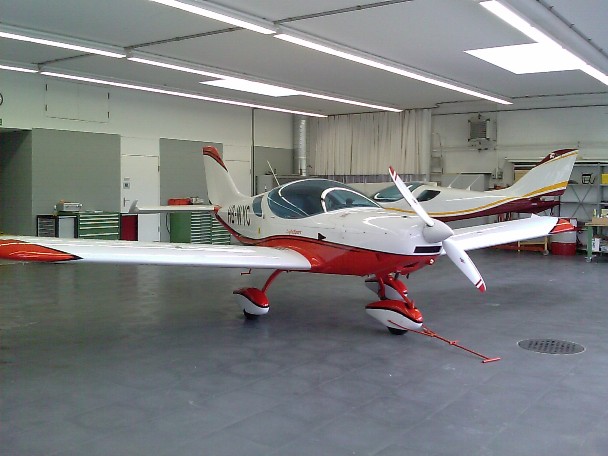
In the afternoon I did the first half of my “type rating” on the SportCruiser, using HB-WYC of our flying club. That will allow me to get some SportCruiser routine before the first flight with my own plane, which is not bad considering the sensitivity of the elevator and the importance of controlling the speed during landing.