
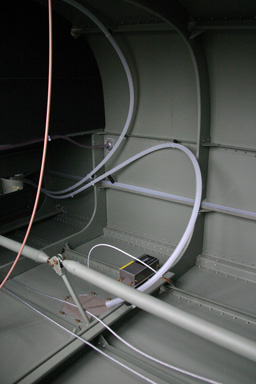
02.03.2009: Another month starts, but again with a good day of building. First I wired the remote compass module and the OAT sensor, as well as the ELT antenna, to be able to close the fuselage. I could not use the tube running to the ELT antenna location for the ELT antenna cable, as it came with the BNC connectors installed and they did not fit through the tube, so I rerouted the tube down towards the compass module to use it for that cable. On the left picture the original routing, on the right one the new one.

I then connected the remote compass to the Dynon EFIS to verify whether everything works. I got a report “OAT sensor not detected”, and the manual said for this case “check the wiring”. This annoyed me, as I am an electrical engineer, but then I realized that one has to select the type of OAT sensor in the setup menu of the EFIS, and once I did that everything worked perfectly.
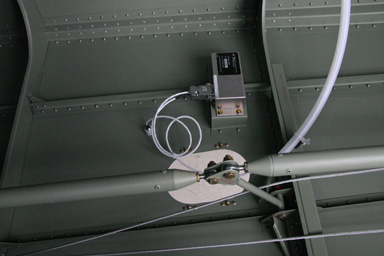
I left some spare cable so that I can remove the remote compass through the maintenance hatch if this is ever necessary…..
…and then closed the fuselage.
I am slowly running out of rivets, which means either that there were not enough of them with the kit or alternatively that soon everything is riveted.
Rolf and I then spread out all the upholstery foams and carpets to see where each one goes. The assembly manual does not cover upholstery installation, but after I placed a question on the Yahoo SportCruiser Forum someone sent me a document that shows how to do it. Thanks.
I find that the gray carpet, which should go into the luggage compartment behind the seats, does not really fit well with the brown leather of the seats, so I will try to find a beige one. We measured the size and checked the weight, so we know now that we need 1.3 x 2 m and the weight should be around 200 g / m2.
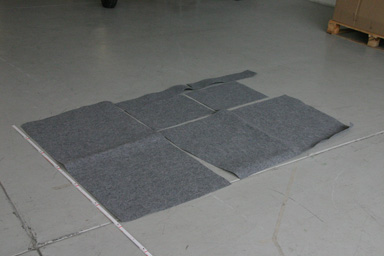
The side walls are covered with foam, over which leather will be glued. From what I have read on Yahoo most builders put some cardboard backing between the foam and the leather, so I will look at that too. We have a small company doing upholstery on our club’s planes, so I guess I will have to pay them a visit soon.
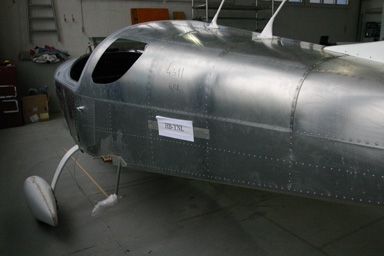
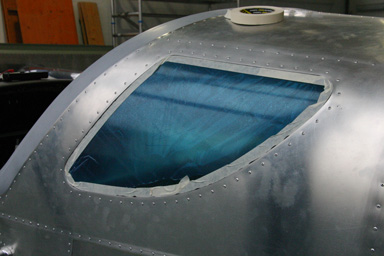
During lunch break we discussed the painting of the SportCruiser with Andi Rombach, who will do it, as he was at the airport doing some work on the Robin DR-40’s of the club. He recommended that we install the side windows prior to painting, so we went for that after lunch. The windows are sandwiched between the fuselage skin and a small window frame, and Silvan recommended that we use some sealant to prevent water from getting in.

Below the window clecoed into place…
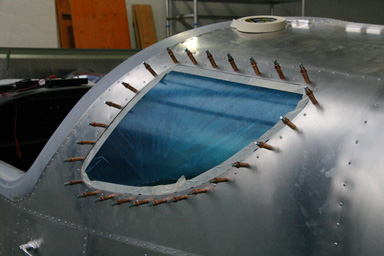
…and then riveted. We used some masking tape to catch excessive sealant which was squeezed out when we riveted the whole assembly, which worked perfectly.
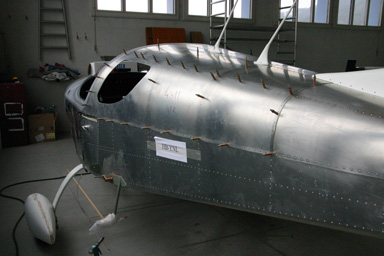
Apart from the wingtips the structure is now ready for painting. We are slowly getting there, so deciding on a paint scheme and colours is suddenly becoming a high priority topic.
09.03.2009: Today I went to talk to the specialist who does all the upholstery repairs on the planes of our club. I was not sure whether putting a cardboard between the leather and the foam on the sidewalls, as done by many of the the UK builders, is “standard practice”, but he confirmed that this is how it is normally done. He told me some other methods, such as putting the leather and a thin layer of foam onto a very thin aviation grade plywood and attaching that one to the foam with Velcro. This would have the advantage that the side panels could be removed if necessary. I have not yet decided how I will do it but his advice was very helpful.
I also asked him where I can find carpeting for the baggage compartment that would fit better with the colour of the leather seats than the gray one supplied with the kit. To illustrate the case I brought one of the leather seats with me, and he really liked the quality and how it is made. He then told me what I need, and sent me to a local carpet manufacturer from where he gets his materials. They would actually have one that would fit perfectly, but it is only available in rolls of 50 meters and I need only 2…. They promised they would try to find something else and call me back, let’s see.
13.03.2009: Today I continued with my upholstery saga. I went to a carpet shop to search for the felt to cover the luggage compartment. They didn’t have anything so they sent me to a car upholstery shop. From there I was sent to a fabric shop, from there to another upholsterer and from there to a curtain shop.
There they told me that there is a felt factory in Wil, which is 20 km from where I live. I called them but they do not have a shop for private customers anymore, they only sell to corporate customers or over the internet. After describing my requirements (2 – 3 mm felt, 250 g / m2, beige colour, robust) they promised to send me a sample. Let’s see what I will get… Then I remembered that the wife of Thomas, another builder, is a tailor, so I will ask her if she knows where I can find the kind of felt I need.
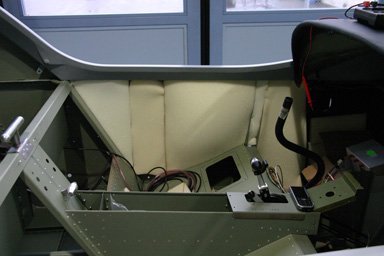
15.03.2009: I am finalizing the panel layout so that I can have it cut. The plan is currently to have it cut by waterjet, but that will depend on what that costs. The most critical section to be cut is the middle one, as the Garmin 695 does not have a front panel that extends over the cutout, so if the cut is not fully straight this can be seen easily.
Of course I want to be sure that I made no mistakes so I printed the drawings and compared them with the wooden mockup we built. I then installed the real instruments into the mockup to check whether there are any conflicts. As you can see below everything looks ok from the front, the same is the case from the back…. Cool…
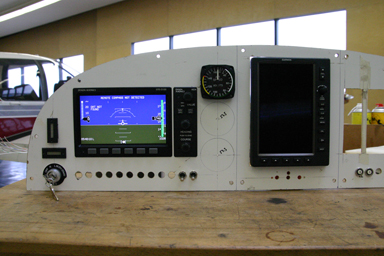
I still have to move the trim indicators on the left side up a bit to make room for the parking brake knob. I will also place a few indicator lights on top of the Dynon D100. The heating knob will go on the passenger side and the carburetor heat in front of the throttle, to the lower left of the fuel valve. I still have to decide where to put the flap switch. I initially planned to put it right behind the throttle, as can be seen on the picture below. I had to relocate all of these as the vertical section of the centre console is where the radio and transponder go.
I am not sure however whether it is prone to accidental activation at this location (e.g. with the food tray the Stewardess brings me from the galley on longer flights…). I also still have to design a mechanism which allows me to swing the Garmin 695 open to access the “glove compartment” I intend install behind it.
For those who are interested I will upload the drawings of the panel to the documents section as PDF as soon as they are finished. If anybody needs them as Visio drawing just send me an email.
29.03.2009: I was asked today why I have not updated my log for nearly two weeks. Well, I was one day in Brussels, then three days skiing, then again one day in Brussels and finally three days in Madrid. This weekend we had our annual “airport cleaning day”, where we prepare the new season, and next week I will be in Malaga (for work). Work keeps me quite busy for the time being, so building suffers a bit. I have however finalised the panel drawings, they can be found as PDF’s under “Documents”. I will bring the panel to be cut on Monday, so that it should be finished when I am back from Malaga. I have also ordered the last material from Aircraft Spruce Europe.