04.10.2009: Finally I am back at building. I spent the whole day finishing small items that have been left out before. First I started with the “carburettor heat” cable. I installed the knob next to the fuel switch, in order to have all engine controls at one location (throttle, choke, fuel selector, carb heat).
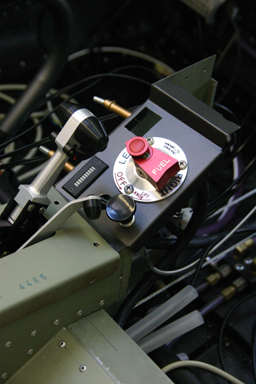
Between the carburettor heat knob and the flap position indicator I will install an autopilot disengage switch, which is required for each installation of an autopilot. My aim is to be able to control all essential controls with the hands more or less on the stick and throttle. I do not want to have to search for the autopilot disengage switch on the panel in bumpy weather.
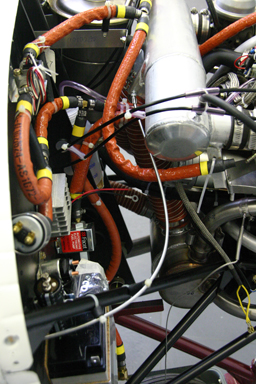
Below the carburettor heat control cable forward of the firewall.
Next I finished attaching the rudder cables to the rudder pedals. I was not sure whether locknuts can be used or whether castle nuts with cotter pins are required in the control system, but after some searching through the pictures I have take during my visits to Czech Aircraft Works I found that the latter ones are used by the factory. The most difficult part however was hooking up the two springs that control the tension in the rudder cables.
Next I started sorting all the cables I received with the kit to wire the fuselage. We originally ordered the kit with the TruTrak autopilot, but then later decided to switch to the one from Dynon when it was released. We therefore received the cables for the TruTrak. Fortunately that one uses more leads, so I can make the Dynon cables from the ones we received.
08.10.2009: Today Rolf started installing the landing lights. He build them as modules, which are then installed using four M4 screws. Here a top and side view.
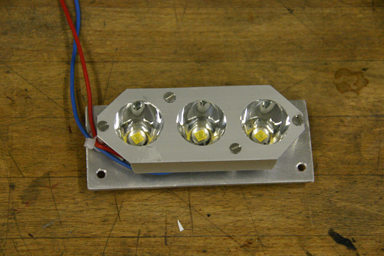
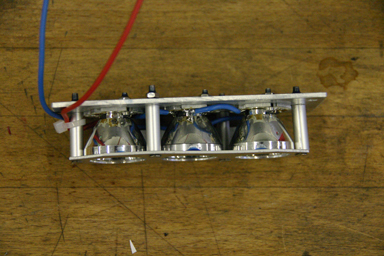
The lights go into the oval shaped openings near the wing tips. We put springs between the light and the wall onto which they are mounted so that we are able to adjust the beam.

The plexiglass covers will be held in place by M3 screws. Instead of installing nut plates we used nuts that cut into the aluminum from the rear. They are very easy to install and sufficient as there is absolutely no load on them. And it is likely that the covers will never be taken off during the lifetime of the plane.
I also installed the 22’000 uF capacitor required according to the Rotax manual to smoothen the output of the rectifier. We ordered a long life type that is approved for up to 125 oC not to have problems with it.
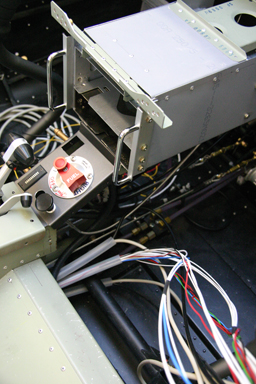
Then I started preparing all the cables, and pulling them through the cable tubes.
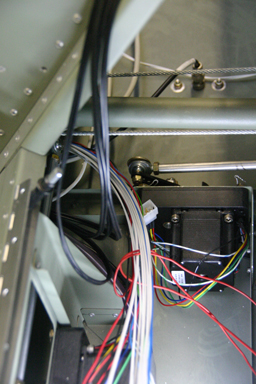
Below all the cables that come from the rear fuselage through the six cable tubes.
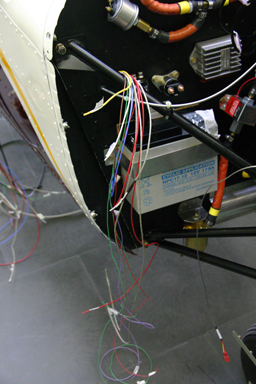
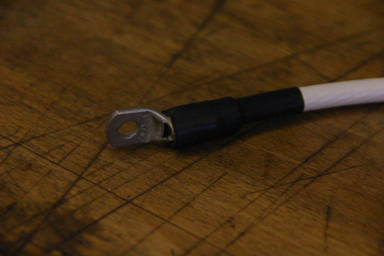
I also installed the cables which go through the firewall to the engine compartment. Again there are quite a few, but they all came with markings on both ends specifying what they are used for, so quite easy to do. I also went to Kuerzi to fetch cables to connect the battery and the starter (AWG 6 and 8). They are thicker than what I was told they should be, but I prefer to be on the safe side and they are so short that this does not really add weight. I’m quite strict on controlling the weight, but I believe these few extra grams are worth it.
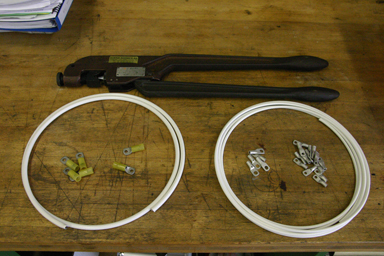
10.10.2009: One of the more difficult items on the agenda is to make the starter cables. I am not sure whether they should have been part of the kit, but at least I did not receive any. I had a look at various electrical schematics and noticed that they are either made of AWG 6 or even AWG 4 cable. Being a cautious person (and an electrical engineer), I opted for the thicker ones (AWG 4), which are equivalent to about 20 mm2.
That is of course not the kind of cable one has laying around, and even less so are the ring tongue terminals and the crimping tool. Fortunately again, Kuerzi Avionics, which is conveniently located next door to our maintenance shop, had all the required material. The crimping tool was not at hand as one of their engineers took it to a customer, but they promised it would be back on Friday evening so that I could have it on the weekend.
When I went today to the airport it was indeed there. They even wrote me short note how to used it to get the best results. Great service, highly recommended. Here what I found on the work bench:
The cable on the left is the one for the starter, the one on the right is the mains that goes from the battery to the panel (AWG 8). I started with the starter one, and largely thanks to the instructions installing the ring tongue terminals went without a problem. I was positively surprised, as I have never made such thick cables before.
Below the cable from the battery to the starter relay, and from there to the starter, after installation. I tried to keep the cables short, but non the less made sure that if ever would have to install a battery with the connections reversed I could bend them over to the other side of the battery. One of my fellow builders had that problem recently, and had to get new cables..

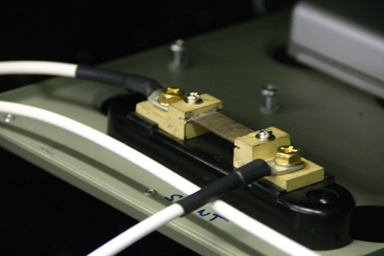
11.10.2009: I finished the thick cables today. Below the ones that go to the shunt resistor, which is used to measure the current consumption.
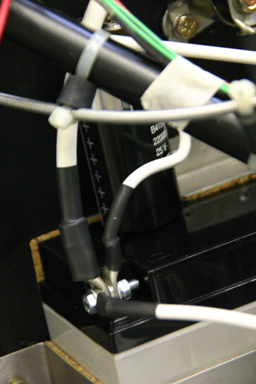
Below a view on the negative pole of the battery. I ran the return lead from the starter (which is connected to the engine block) directly to the battery and a thinner one from the battery to the ground connection at the base of the starter relay. The other one of he “thin” cables goes to an external power connector. Like that, if ever the battery is flat, an external charger or battery can be connected without having to remove the cowling.
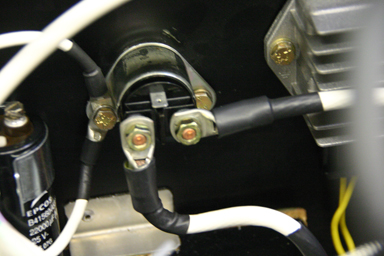
Here the leads as they are now connected to the starter relay.
I also started wiring the various sensors that connect to the Dynon EMS (cylinder head temperature, oil temperature and pressure, exhaust gas temperature etc.).
15.10.2009: A very good friend from a very flat country (highest “mountain” 170,86 m, not counting buildings or bridge pillars, or factory chimneys) is visiting us for a longer weekend, so we decided to go and have a look at real mountains by plane. We have tried that before during other visits, but the weather has always been too bad. We decided to fly to Samedan, elevation 5600 ft or 1708 m, meaning it lies exactly 10 times higher than the highest mountain in that flat country (readers can guess themselves which one it is…). There were quite some clouds on the way up, but the Engadin valley once more proved that it has usually nicer weather than the plains.
Below a picture of our plane parked on the apron in Samedan, the one behind the business…
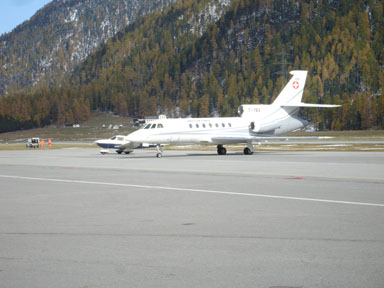
The marshaller made a mistake when guiding us into the parking position next to a Falcon 50, which is actually the biggest business jet of our government, so if I would have followed his signals blindly I would have hit the wing of the Falcon with the wing of our Archer III. Luckily my copilot and I paid attention, it would have been embarrassing to end up on the front pages of some newspapers… For that the Swiss Air Force owes me something…
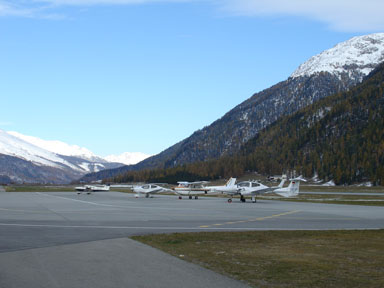
When going back to the plane after lunch the Air Force One had left, and the weather cleared even more so that is was nearly all blue sky. We were tempted to take one of the Diamonds parked on the apron in exchange for our Archer III…
The flight back was spectacular. The day before the first significant amount of snow fell, turning everything into a very nice white cloth. We saw that in St. Moritz the snow cannons were running at full power, and in Davos they were already preparing the slopes. Winter is definitely on it’s way in…
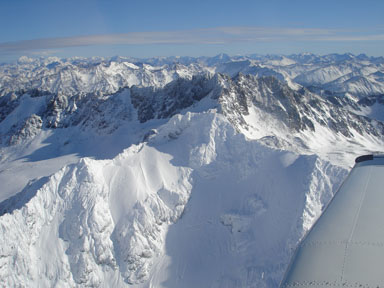
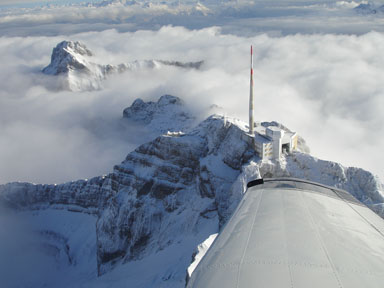
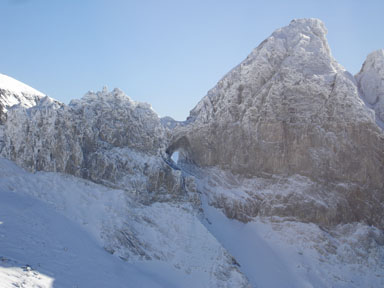
When getting closer to Lommis we still did the compulsory turn around the Säntis. we then had to fly back a bit as there was a more or less closed cloud cover over the plains, diving underneath the clouds through one of the bigger holes along the mountains.
17.10.2009: Today we went with our visitor to see the new Dornier Museum in Friedrichshafen. It just opened on the 24th June 2009, so everything looked brand new. The museum is located at the airport of Friedrichshafen in a newly built hangar with a quite fancy architecture on the outside and a lot of light inside..
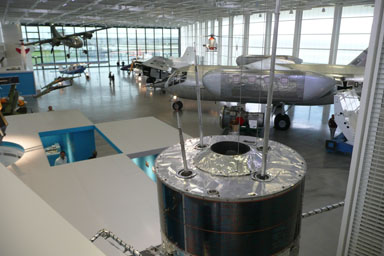
The museum covers all activities of the Dornier company, from the flying boats of the 20s and 30s to the satellite activities of the last decades. Parts of the Dornier company were merged into EADS, parts were spun off into independent companies and the aviation activities were finally sold to Fairchild in 1996. That company went bankrupt in 2002. Some assets were then sold off, like the Dornier 328 and 728 projects, the rest was taken over by RUAG Aerospace, a Swiss company. That part is developing well, and they are currently restarting production of the Dornier 228 STOL aircraft.
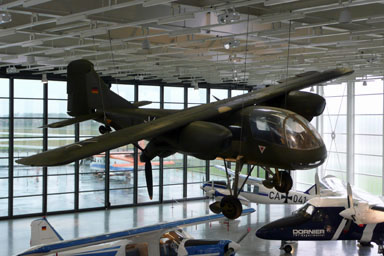
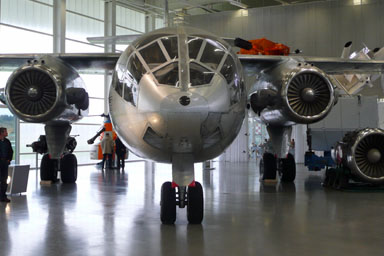
As a homebuilder I was of course looking for ideas for the next project, and apart of the Dornier Whale flying boat I found the following ones inspiring:
A near vertical takeoff twin engine plane, not the engine tilting downwards for short take off…
…or a true vertical takeoff jet transport…
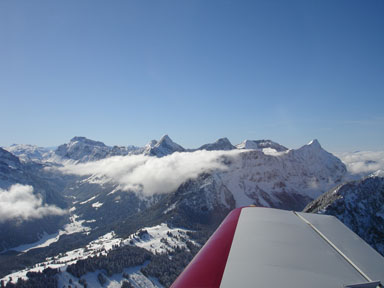
19.10.2009: I did another flight with my visitor today, this time in a Robin DR 400. The weather forecast was predicting a low layer of clouds which would break open in the afternoon, and blue sky above. The result was exactly as predicted, with a visibility above 6’000 ft of around 1’000 km…
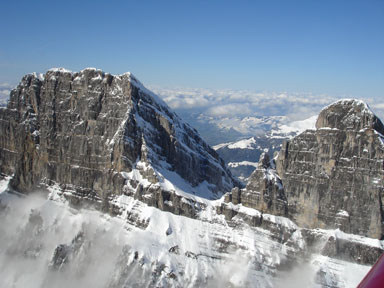
We flew from Lommis straight south past Glarus to the Tödi…
…then past the Martin’s Loch (a 17 by 19 m hole in the mountain)…
…then back past the Churfisten.
In the words of an airline captain on a flight I took some years ago under similar conditions:
“What a lovely day for flying…”
25.10.2009: After a very busy working week I managed to spend two hours today at the airport. I continued wiring the engine, hooking up the oil pressure sensor as well as the ignition cables. I am a bit puzzled that the Rotax instruction says the shield of the two cables between the electronic ignitions and the ignition switch should be grounded at both ends. On rail vehicles or in rail signalling installations (my daily business) one would never do that. I will probably leave the ground on the engine side open, as I can easily correct that later.
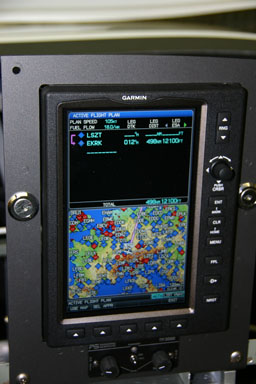
My friend who visited us last weekend lives not too far from Roskilde Airport (EKRK) in Denmark, so I entered a flight plan today in the GPS to see how far that is from Lommis (LSZT). In a direct line it is 498 nm, which means around 5 hours of flight. One does not have to make significant detours, as the direct route nicely avoids any bigger airport in Germany. At 18 litres/hour that’s 90 litres of fuel, meaning there is more than an hour left when landing. A non stop flight should therefore be possible, or one with just a short comfort stop… But before that the plane has to be finished…
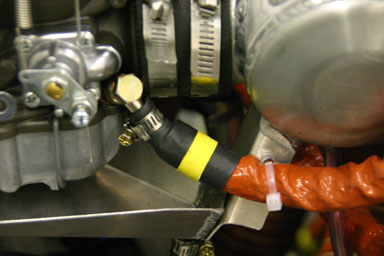
26.10.2009: I managed to spend a few hours building again today, mostly with wiring. I also finished hooking up the fuel lines to the carburettors as well as a number of other small items.
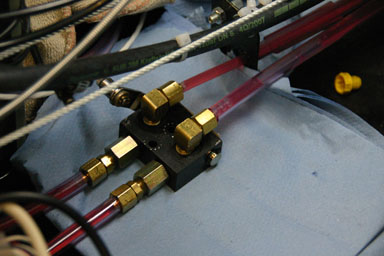
29.10.2009: Today I finally attacked the brake system. First I had to hook up the brake lines to the brakes, which was the easy part. Then I filled the brake system with brake fluid. Getting the air out was not that easy, but luckily Silvan knew some tricks how to do this. Below the brake cylinder wrapped in paper to catch excess fluid coming out on top of the cylinder.
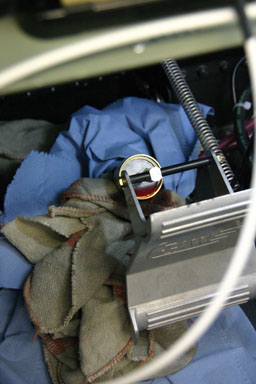
Thanks to being at the airport I also had access to the right equipment, which again simplified the work..
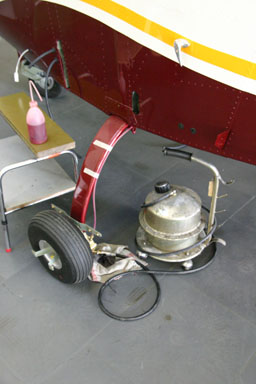
To be able to better flush the brake tubes I built a venting tube which catches the overflowing brake fluid into a container. I did not find the right nipple to screw into the venting hole on top of the brake cylinder, so I made one from brass. It is basically just a hollow screw of the right thread (10-24) that has a cylindrical end over which a flexible plastic tube can be pushed.

Only once everything was filled and most of the air was out I noticed that the parking brake valve was leaking heavily. There was a big puddle of brake fluid on the cockpit floor. Aargh… So everything had to be emptied again and the valve taken out. I sent a mail to Matco asking what to do, but in parallel Silvan had already taken the valve apart. He saw that the o-rings were all damaged during the valve assembly by a small burr at the hole where the valve camshaft is inserted into the valve body. We carefully removed the burr and installed new o-rings (which luckily are standard size items that where on stock). We then reinstalled the valve, filled everything again with brake fluid, pushed the air out again etc.
Below a picture taken during the reassembly. Air bubbles can be seen in the brake tubes. After the air was out we put pressure on the system and closed the valve. After two hours not a single drop of fluid was visible on the paper I put underneath the valve, so it seems the repair worked. I will let the whole thing under pressure overnight and then see tomorrow what it looks.