03.04.2009: Today I went to the Aero Friedrichshafen, the largest general aviation exhibition outside the USA. Luckily Friedrichshafen is only about 30 minutes by train plus 45 minutes by ferry (across Lake of Constance) from where I live, so going there just for a day is quite easy. Below some impressions from my visit.
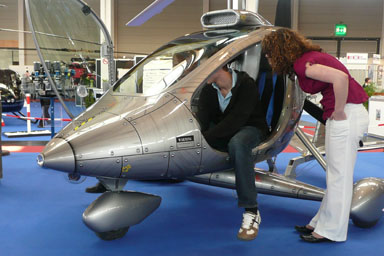
First of all the ultimate fun mobile. It is a combination of powered hang-glider and motorboat, and on top of that it has a retractable gear, making it amphibious.

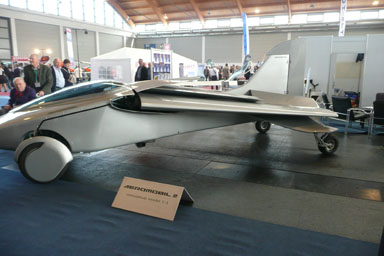
Then there was yet another attempt to build a flying car. Unfortunately it is powered by the propeller even when in road-mode, which I believe is quite dangerous and probably impossible to get certified for safety and noise reasons. On top of that the video shown at the booth showed a lot of road shots, but each sequence always ended shortly before takeoff. Maybe it does not fly yet….
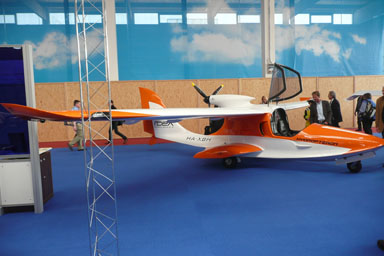
Below another fun mobile, a really nice amphibian that looks more realistic than the flying car above.
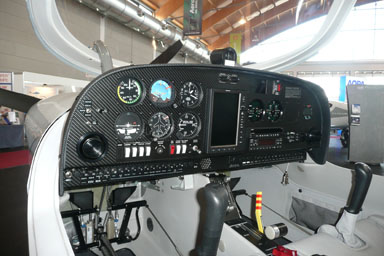
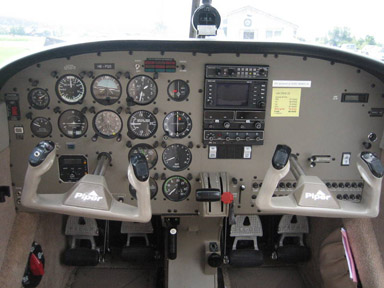
An the Diamond boot I saw a panel with a Garmin GPSMAP 695, the one we will put on our panel.
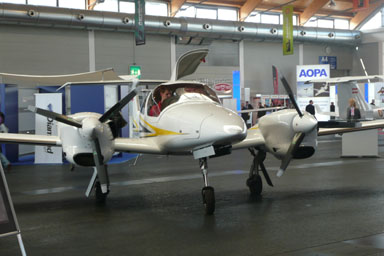
The DA42 on display, as well as all other Diamond aircraft shown sported the new diesel engine from Diamond aircraft which replaces the one from Thielert. Unfortunately the engine block is tilted 45 degrees, which requires a very oddly shaped cowling. This makes the otherwise very nice looking planes look outright ugly.
Next on the list of fun mobiles was an autogyro with a very nice painting. Maybe we should paint our SportCruiser in a similar way…
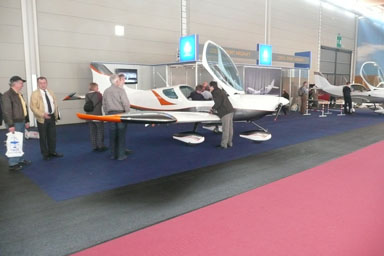
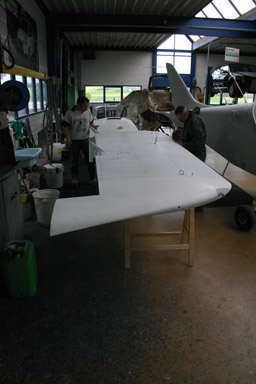
And finally the SportCruiser. The legal battle between the original owner of Czech Aircraft Works and the investor that made the growth of the company possible seems to have been settled only one or two days before the opening of the Aero exhibition, with the result that the planes on the booth arrived only on Friday afternoon after the Aero had already opened. The plane is still produced in the same factory by the same people, but now under the brand Czech Sport Aircraft. I have learned that around 150 SportCruiser have been produced last year and around 350 are now flying. The factory can currently produce 25 a month and will open a second assembly line soon.
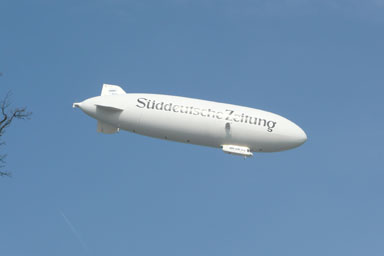
When waiting for the bus on my way home the Zeppelin NT just came in for landing, it is always a great sight..
07.04.2009: Yesterday I finally brought my panel to be cut.
I still had to do some minor corrections, as the final check revealed a conflict between the leftmost fuse on the right panel section and the panel mounting. I uploaded new drawings to the documents section which show the final version.
I thought of doing the cutting myself manually, but there are so many complex shapes that this would be a lot of work. In addition it would be very difficult to have everything nice and straight, and the first thing you see when climbing in your seat is the panel. In the end we asked a guy who works in our factory whether he could do it on a CNC machine, and he immediately said yes when he heard what it is for! He spend a Saturday in the factory programming his machine and cutting it for us.
On the right side next to the EMS I intend to install a panel mounted compass, so that I do not have to put one on top of the glareshield. As I am not sure however whether the Dynon could influence the compass I told the guy at the factory not to cut that hole. I will install the Dynon, power it and then see first with a handheld compass whether there could be a conflict.
I also found a way to install the GPSMAP695 in the panel. I always wanted it to be removable, but do not have the space to use the AirGizmo mount (and also do not want to spend 200 $ for it…). When looking into one of our electronics cabinets at work today I realised that most modern components are clip mounted onto top hat rails. Phoenix makes a great clip than can be used to mount whatever onto one of these rails, so I will try to design something around that. Pictures will follow.
Below some more impressions from the Aero, which I forgot to post. First I saw an aesthetically pleasing propulsion system on a glider.
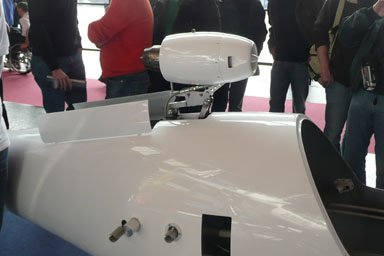
Maybe I could use four of them under the wings of the SportCruiser (like on an Avro 100)….
I also had a look for LED lights (landing lights, nav lights and strobes), and how they aremounted . A large variety of lights was shown, but I am not sure after designing our own whether they all meet the FAR 23 requirements (and indeed most of them did not claim to do so). Below some examples:
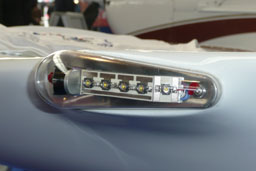
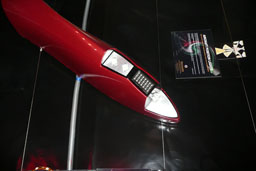
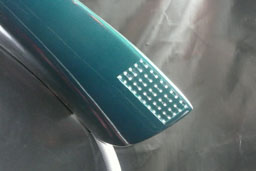
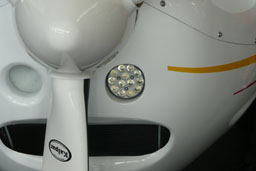
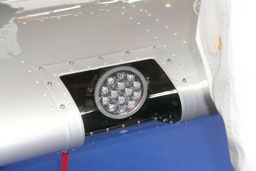
It is quite irritating to see that only a few of the LED lights have a design which takes advantage of the possibilities of LED’s, most of them look like plain bulb replacements.
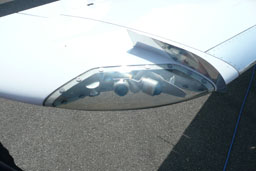
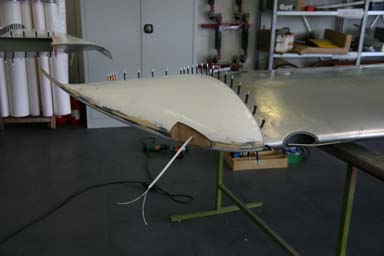
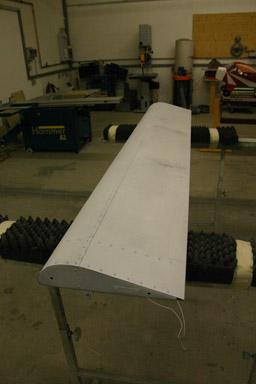
08.04.2009: Today we finally started with our landing light installation. Instead of making a square cut into which the light is mounted we designed an oval one, purely for aesthetic reasons. Note that there is one in each wing tip, the description below if for the first one we did. The other one is identical.
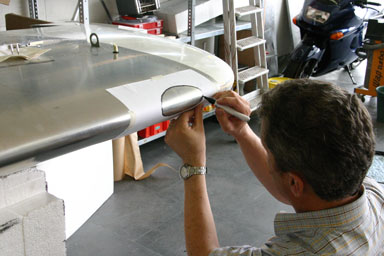
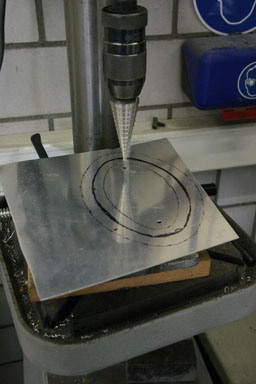
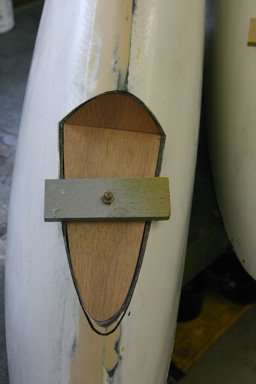
First I made a template to transfer the shape to the wing leading edge:
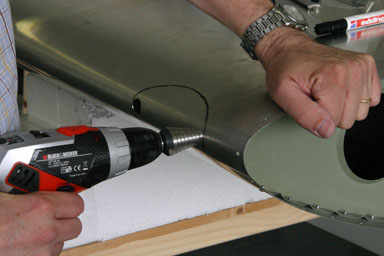
Then we drilled two holes at the edges of the cutout…
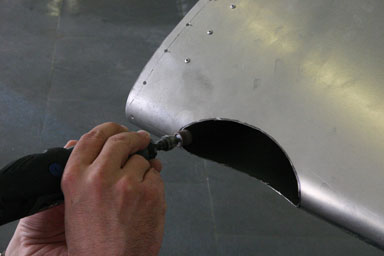
and then cut the rest with a Dremel tool.
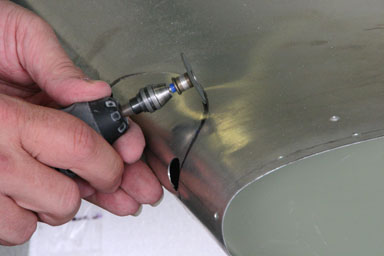
I also used the Dremel to smoothen the edge of the cutout.
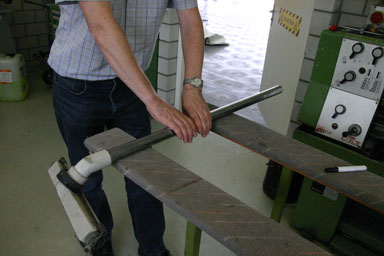
Rolf then started to make the frame, onto which the plexiglas will be mounted.
I used a very sophisticated tool to give it the right shape (the vacuum cleaner tube has the same radius as the leading edge, does this mean something?).
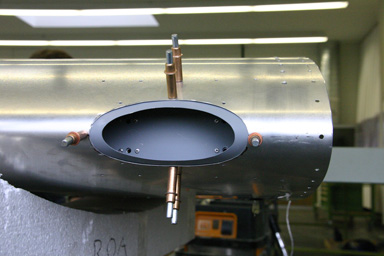
We then installed the frame…
and finally cut out the inner hole. Like that the Plexiglas will be flush with the wing skin.
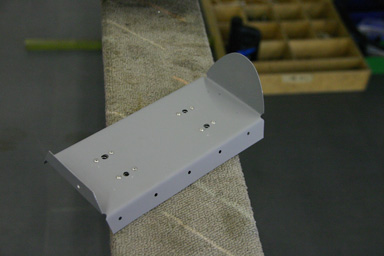
The landing light will be mounted on a plate we made….
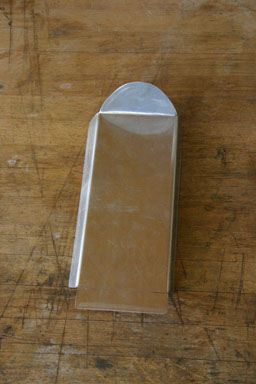
which is mounted behind the cutout.

08.04.2009: I finally delivered the engineering documents to the EAS today. These documents form the basis of the “certification” of the SportCruiser as Experimental aircraft in Switzerland. Hans Kandlbauer, leader of the EAS Technical Team, was very satisfied with the quality of the documents, so let’s hope they will be approved quickly. For Thursday another day of building is planned, let’s hope we can finish the landing lights installation as well as the one of the NAV lights / strobes.
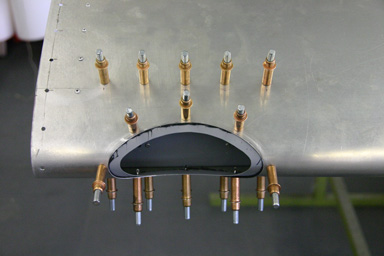
16.04.2009: Today we continued with the landing lights. As the lights have to be adjustable we installed four anchor nuts in the backplates onto which the lights can be fixed with adjustable screws. We then put a layer of primer onto all parts…
and assembled everything with clecos. We then repeated the whole landing light process on the second wing.
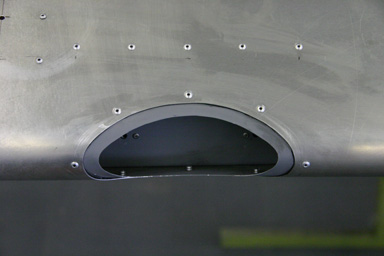
17.04.2009: Today the weather was quite bad, so instead of going hiking to the mountains I spent another day building. First I finished the mountings of the landing lights. Water could enter between the landing light window and the bracket onto which it is mounted, so I used the same type of sealant already used to seal the side windows to prevent that.
Here the result of the effort. The window over the landing light will, once installed, be flush with the wing skin. We thought oval windows would look cooler than the rectangular ones used on most other planes…
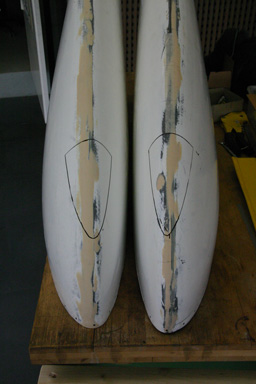
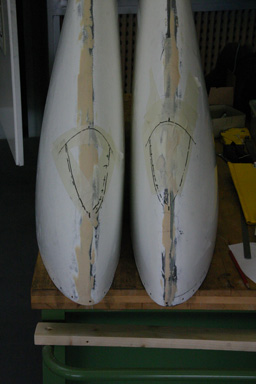
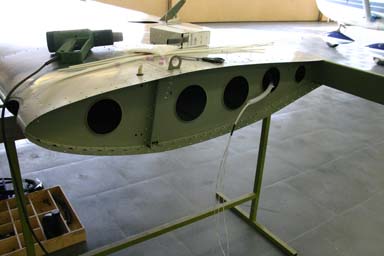
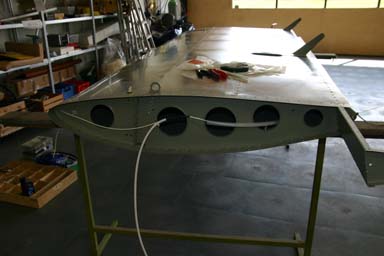
After that I started with the cutouts in the wingtips where the strobes and NAV lights will go. Again for aesthetic reasons we did not want to mount the strobes and nav lights protruding from the wing tips, as the typical Wheelen units do, but to mount them so that they are flush with the wingtip. On the left the first sketches, on the right the final shapes. The curvature of the two wingtips is not fully identical, that’s why the shape of the two lights are slightly different. This will however not be visible once the wingtips are installed.
The whole measuring and drawing took me more than two hours, as I had to make sure that I will get straight cuts even though the surfaces are round. I also hat to make sure the the NAV lights will be visible from the correct angles only. And finally I also had to compensate for the 5 degrees dihedral of the wings.
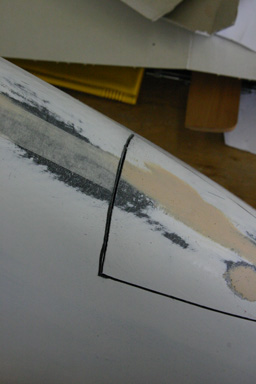
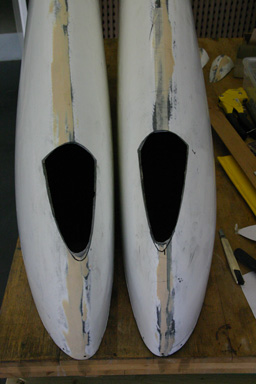
I then started making the cutouts using an ordinary handsaw. The result of the first cut can be seen on the left picture, the final cuts on the right. I kept the cutaways, as we will use them to shape the windows on a thermoforming machine.
As the wings were laying nicely upside down on stands I decided that this is probably the easiest moment to look after the latest service bulletin issued by Czech Aircraft Works. CZAW noticed some time ago that the wrong type of sealant has been used in some planes when installing the fuel strainers in the fuel tanks. The SB requires the owners to verify whether the sealant is red, and if so to remove the fuel strainers, clean them and install them again using the right sealant. The wrong type sealant would be dissolved by the fuel, which could block the filters and the fuel flow to the engine. On our plane the red type of sealant was easily recognisable by just looking through the maintenance hatch, so we did as instructed in the service bulletin. Below a picture showing the fuel line where it is attached to the fuel strainer.

18.04.2009: Urgent! For those who still want to participate in my drawing contest for a paint scheme, I will close it on Tuesday next week so there is a last chance to win.
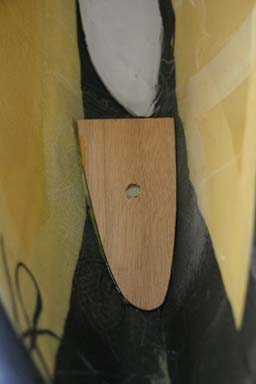
21.04.2009: Today I continued with the cutouts for the NAV lights and strobes. They have to reach a state by the end of this week so that the wings can be painted. To close the holes I made some panels from aircraft grade plywood, which I then glued into the holes.
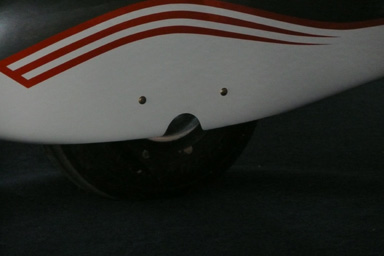
At the Aero I noticed that the wheel pants have cutouts to access the air valves on the tires, as can be seen on the picture below.
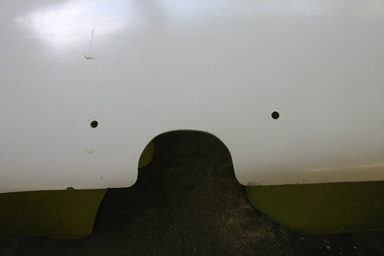
I marked similar cutouts on my wheel pants…
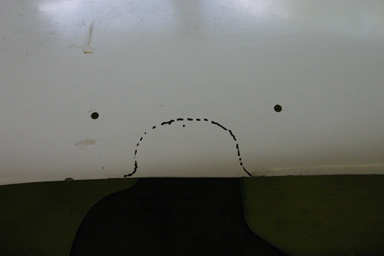
and cut them out using the Dremel.
Finally I added the wires for the NAV lights, strobes and landing lights to the wings. I went over to Kuerzi to get aviation grade Tefzel wire. I am using AWG 20, not 18 as the factory, as our LED lights use less than half the current compared to conventional lights. Installing the wires is quite an easy job as the wings contain plastic tubes through which the cables go. CZAW even pulled cords into the tubes to simplify the job, small details like that are showing the quality of the kit.
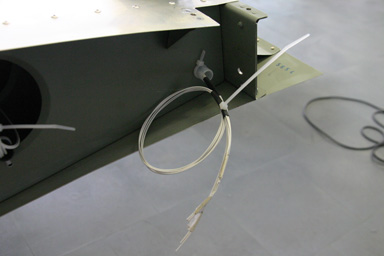
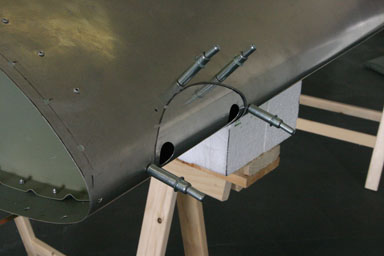
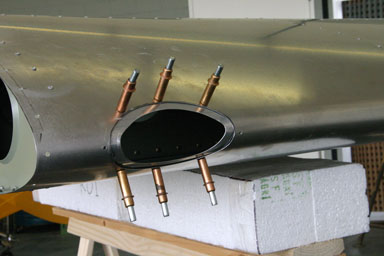
23.04.2009: We continued with the wings today. First we finished the cabling. Three pairs of cables for landing light, NAV light and strobe run from the wing root to the wing tip in a plastic tube. One pair runs from there to the landing light cutout and two to the NAV light / strobe cutout. We ran the cables through protective sleeves and attached them in several places to they won’t move too much in flight. The first picture shows the cables coming out of the plastic tube where the wing tip will later be installed, the second one shows the cables after we fixed them.
We then finished the NAV light / strobe cutouts. To make sure that the wooden pieces hold well we first closed the gap around the wood with epoxy mixed with cotton flakes and then added two layers of glass over them. We also added a small piece of wood in the middle of the wing tip into which we can then put a screw to hold the wing during painting. The piece can be seen on the right picture in the background.

After that we could finally fix the wing tips. It’s the usual riveting game, as can be seen on the pictures below.

Finally our plane has two wings…
After that we started collecting all bits and pieces that will have to get painted. The paint scheme selected will allow us to have most small pieces in one colour only, only the fuselage, the wings near the tips and the lower cowling will have more than one colour. This will simplify the painting, which is scheduled to start next week.
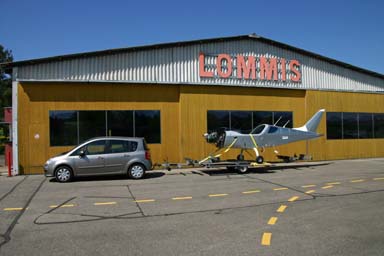
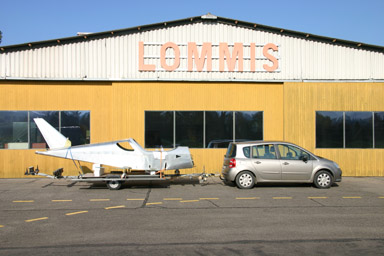
24.04.2009: We intended to transport the plane to the paint shop next Monday. For that I went this morning to pick up a trailer, which Karl from the Flugbetriebs Sitterdorf AG lets us use. It is the same trailer we already used to transport the plane from my garage to the airport. Thanks Karl for letting us have it. Karl told me however that he needs the trailer on Saturday for an unscheduled transport, so instead of fetching it on Sunday we decided to expedite our transport.
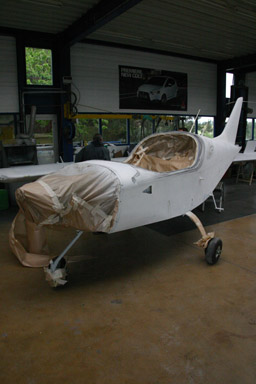
Before that we finished some some minor details on the parts to be painted and prepared the wing stands that will allow us to swivel the wings during painting. When we then wanted to put the fuselage on the trailer we noticed that the SportCruiser has a wider track than most other GA planes (2 m versus e.g 1.45 m of a Cessna 150). That meant that the gear would not fit onto the trailer. After trying unsuccessfully to find something else quickly we prepared a wooden plank that extends the width of the trailer. Like that we finally managed to put the fuselage on the trailer as the picture below shows.
It’s quite a change from what everything looked like in November. Who finds the 10 differences?
We also transported the wings and the canopy to the paint shop, which belongs to the Garage Zehnder in Wängi. Norbert Zehnder, the owner of the company is co-owner of a Yak-52 stationed in Lommis.
25.04.2009: Initially I had planned some building for today, but then I realised that my flying licence expires in a week and that I still need my revalidation checkflight. Fortunately the chief instructor of our club had time so I went to do the flight with him instead of building. We took the Archer III (the only plane free due to the nice weather) and went to St. Gallen and back.
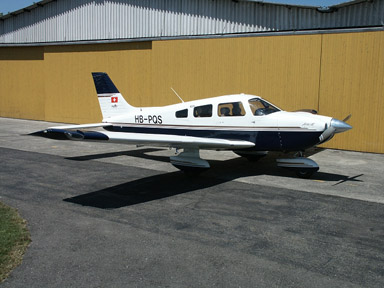
It is probably the nicest plane the club owns, judged from the outside as well as inside, but not very popular as it is 50 kg heavier than our Archer II’s and has a much higher panel, as well as an overhead panel, which limits the view out of the cockpit. Nothing to compare with the view from the SportCruiser…
27.04.2009: You might have noticed on the entry page of my homepage that I closed the drawing contest today. The reason is that we started painting. I received only three entries (!), at least this makes selecting a winner easier for me…
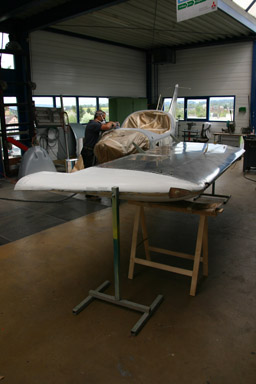
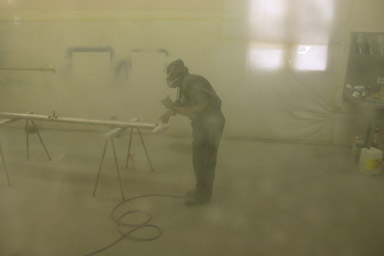
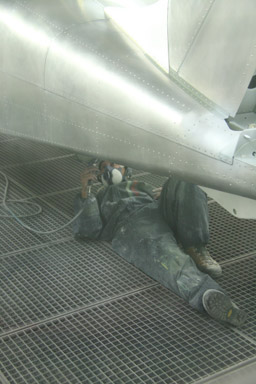
This morning we started with the fuselage. Cleaning, masking, sanding etc…
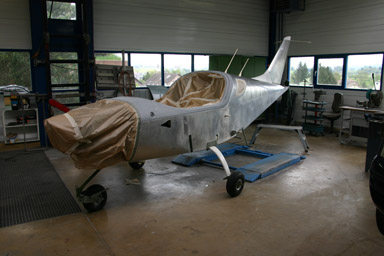
Andi Rombach will do the actual painting of the plane. He is restoring old planes professionally and really knows how to paint planes. He noticed that the composite cover of the fuselage in front of the canopy had a small recess, that’s where the ballistic recovery system goes, if installed. He recommended that we correct this as it would be quite well visible. He filled it with putty and sanded it several times until the recess was not visible anymore. This is by the way the only spot on the plane where we used some putty, as this adds weight. I’m quite strict on controlling the weight, as everything we add reduces the payload.
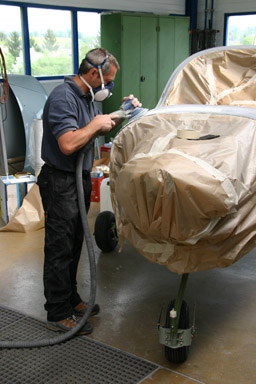
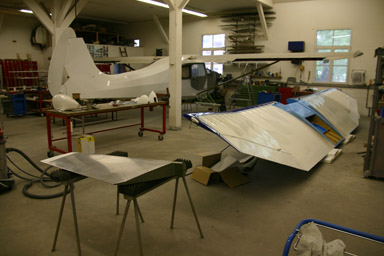
We then started with the wings. The same procedure as with the fuselage, cleaning, masking, sanding etc…
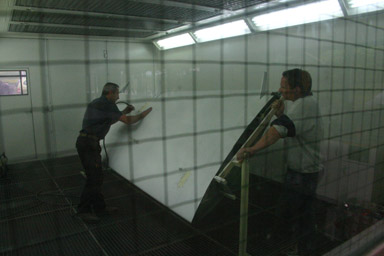
28.04.2009: We continued full speed with the painting today. We are painting in two locations, the fuselage and wings as already mentioned at Garage Zehnder in Wängi and all the small parts at Air Restoration in Hauptwil, the company of Andi Rombach, out painter.
Below a picture of Andi’s workshop. He has a spray booth adjacent to it, which is not as “elaborate” as the one we use for the big parts (e.g. no temperature control and baking), but much bigger and available 24 hours.
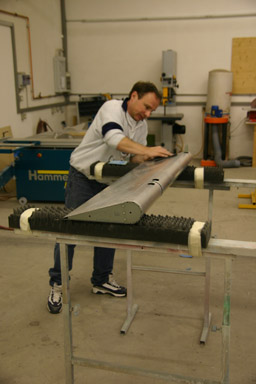
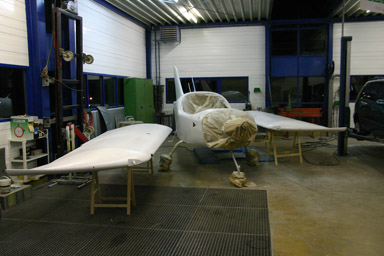
We started preparing all the “small” bits, e.g. rudder, flaps, wheel pants etc..
We then hanged everything into the paintshop….
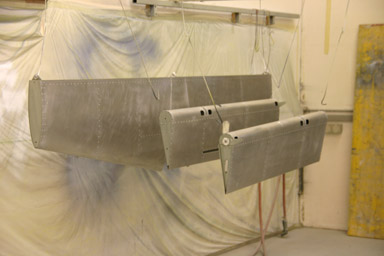
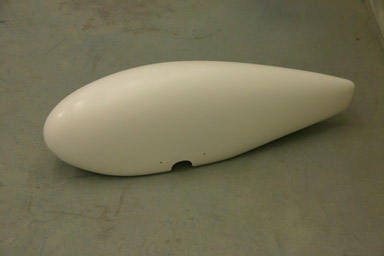
….and Andi started priming. On the composite parts we first filled all the remaining holes with putty and then added a layer of filler. The composite parts from the factory are however of a surprising quality, so there were not that many holes to fill.
Below an example of the result, and that’s just the primer.
After 5 PM we all drove back to Wängi to prime the wings and the fuselage. The guys there are really great. Even though we probably disturb their workflow they put all their cars aside so that we had full access to the spray booth. We only use the spray booth once the shop closes, and are out of it again in the morning when they start working, not to interfere with their work.
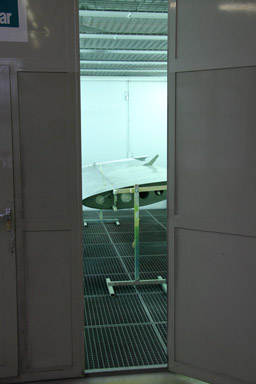
We started with the wings, here the first one primed.
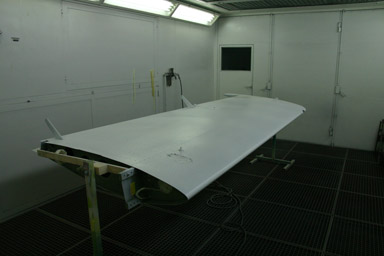
As we were making really good progress we prepared and primed the fuselage too. Here Andi is priming the underside.
Again the result, a nicely primed fuselage. We are using a combined primer / filler, so we can just sand this first layer and then add the actual paint on top.
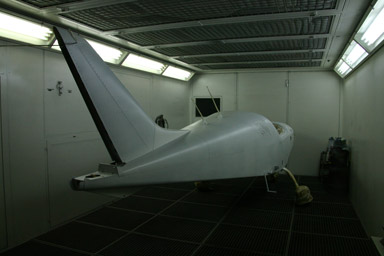
The result of a long day (we started at 8 and finished shortly before 11 PM), the major parts are all wearing the primer. Cool…
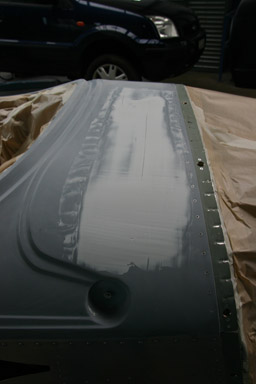
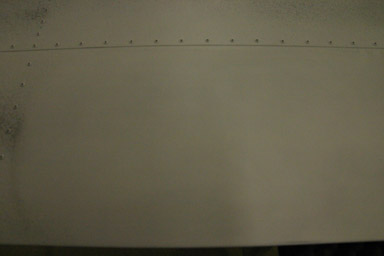
29.04.2009: Today we continued with the sanding, sanding and sanding. To simplify seeing where we have already sanded, Andy added a very light spray of black paint onto the white primer. The process is simple: black gone -> sanding ok. The sanding itself is however very tricky, as a thin layer of primer has to remain to ensure proper bonding of the paint to the aluminum. The thinner the better, however, as this removes weight.

Here one of the flaps, sanded by Rolf.
Later we went back to Wängi to sand the wings. While Rolf did that I prepared the fuselage for painting of the interior. We were so busy that I fully forgot to make some pictures of it, but I will do that tomorrow. Rolf and Andy stayed longer to do the painting, I will see tomorrow what the result looks like.
30.04.2009: Yesterday we relised that the paint supplier had sent the paint by regular mail instead of priority mail, but it today it arrived. Pooh, would have been a pity to have everything ready but no paint…
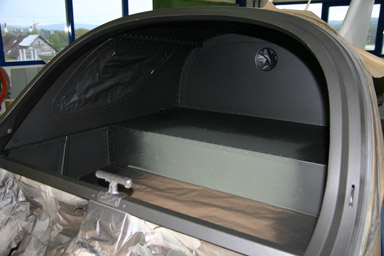
In the morning I went to check the result of yesterdays interior painting. Below the view into the rear fuselage. We used a kind of anthracite, the same we will use for the panel. It looks darker than it is, as the windows are still covered with paper from painting and the bottom surface will be covered by the carpet.
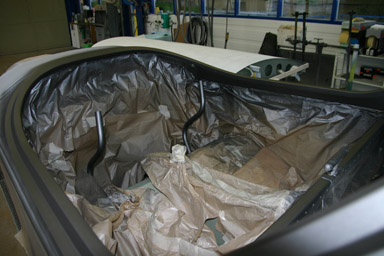
Below the front part of the cockpit. The interior of the window frame as well as the control sticks will also be anthracite.
We then spent the morning sanding, me flaps and ailerons and Rolf the rest of the second wing and the fuselage. Below the result, everything sanded and ready for painting.
Today it became apparent that Andy is a real specialist for painting planes. After we had finished sanding the wings he first blew off all dust with compressed air and then cleaned the wing with a wet cloth, and that while still outside the spray booth. We then moved the wing into the spray booth and repeated the whole process. Finally Andy used a special cloth to catch the last bits of dust remaining. We also covered the wings stands with tape, as they could also have dust on them.
I had to leave earlier, but Andy and Rolf finished the day with painting the first wing in white. Tomorrow we will check the result and then paint the second wing and the fuselage in white too. After that we will continue with the other colors.