02.06.2009: I riveted the mounting trays for the Dynon instruments to the panel today. I used solid rivets, so that they are not visible once the panel is painted. The result looks as follows (sorry, again a picture taken with my mobile phone):

04.06.2009: I spent a few hours today installing the oil and water coolers. That is quite a tricky thing, as they should be precisely behind the openings for the cooling air, but should not touch the cowling. The water cooler on the SportCruiser of Urs touched the cowling, with the result that he had a hole in the cowling after a few flying hours…
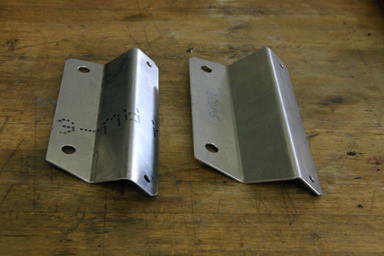
For the water cooler I had to manufacture a new flange, as the one supplied with the kit pushed the cooler to high up. Here the original (right) and my “copy” (left):
When installing the oil cooler I found the first bigger mistake in our building. The cooler is mounted to the rear engine cross bar. As the engine is mounted with a slight pitch to the right to compensate for the torque the cooler has to be mounted with a left pitch. We did drill the three holes in the cross bar according to the builder manual, but then installed it the wrong way round. The result was that the cooler was placed about 25 mm to the left of where it should be.
As there are other holes in the cross bar it can’t just be turned 180 degrees, so I had to drill the three holes again. No big deal, and once done the cooler fitted nicely.
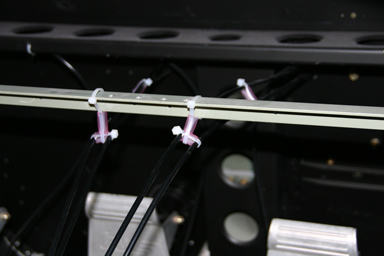
05.06.2009: Today we started fitting all the engine accessories. We proceeded more or less according to the building manual. The first step was to install protective sleeves on some of the pre-fitted water hoses so that they do not rub against the engine mounts. Protective sleeve means a piece of a hose with a larger diameter.
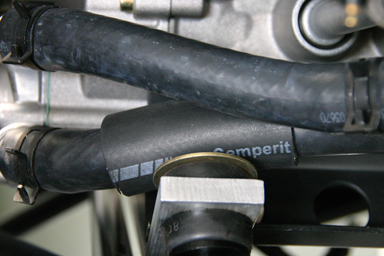
It’s quite a tight fit…
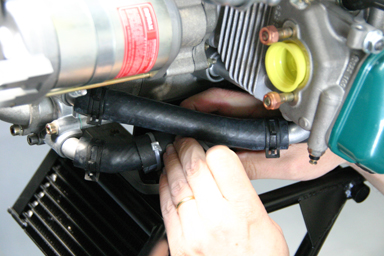
Below the result. Without the protection there would be the risk that a hose is damaged to the point where it could leak cooling liquid.
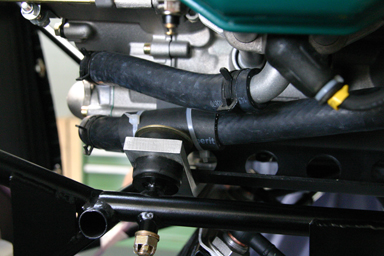
We then continued with the aluminum tubes for the water cooling system.
Pushing the rubber hose over the aluminum tubes requires quite some strength.

Next we installed the oil reservoir…
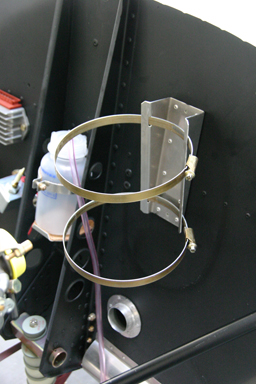
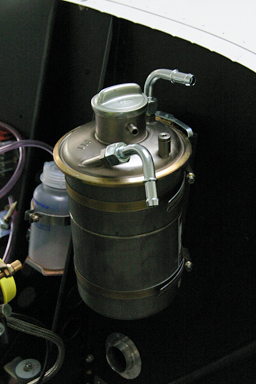
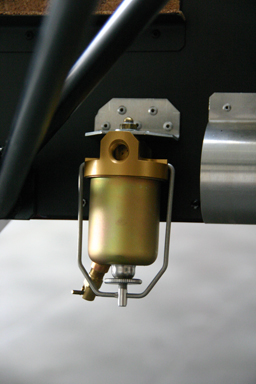
…as well as the gascolator (fuel filter).
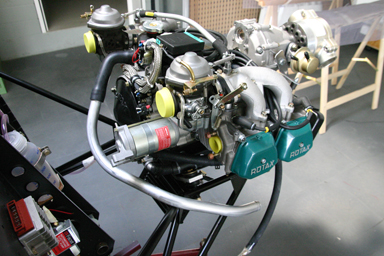
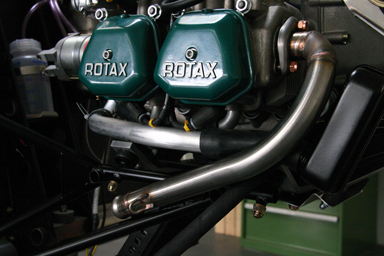
We then started fitting the exhaust to check whether there is sufficient clearance between the various tubes and hoses and the exhaust.
06.06.2009: We discovered that we need another bent piece of water hose, so I will have to order it. We also realised that the clamps for the water hoses have not been included in the kit. I went to three hardware stores as well as three motorcycle shops to find some, but without success. All the ones I could find were either not stainless steel or too wide. I did however find out who makes the ones we need, so I will order them too,
I cut the hole for the remote ELT switch in the panel, so all the holes should be cut now. I still have some space to the right of the EMS, as can be seen below, for future upgrades…
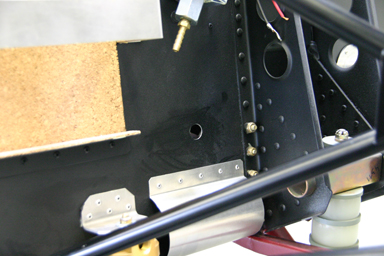
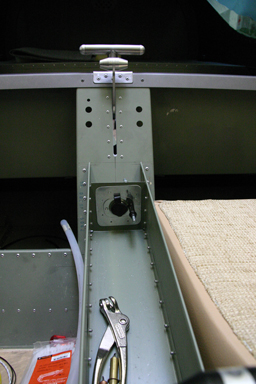
Then I started with the fuel lines. I first needed to drill a hole into the firewall for the vapor lock return line, as shown below.
07.06.2009: Today I checked whether I could install the GPS antennas (for the GPSMAP 695 and the GNS 430) underneath the top skin of the fuselage in front of the canopy, as this would look nicer than putting them on top of the fuselage or on the glare shield. To do that I moved the fuselage outside and placed the antenna of the GPSMAP 695 first on top of the glare shield, then underneath it and then underneath the front of the fuselage, where the chute of the BRS normally goes. I checked the signal strength of the received satellites and did not see any significant difference between the three locations, so I guess it should work. I will probably give it a try, I can still move them later on.
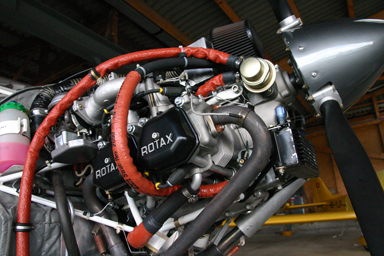
Then “Kitfox Thomas” landed and I went to see how he had installed the oil and water thermostats on his Kitfox (what a surprise). He never managed to get decent oil and water temperatures until he installed the two thermostats. Since he has them the temperatures rise much faster and then stay at the correct level more or less independent of the power setting, so he is very satisfied with them. As can be seen on the picture below the space under his cowling is much tighter than on the SportCruiser.
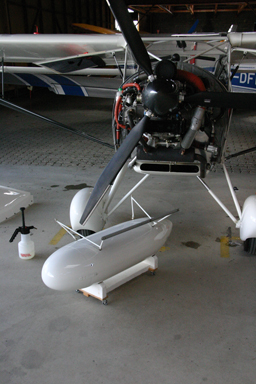
Thomas recently build an “bomb” to get additional baggage space in his Kitfox, as he often uses it for longer trips. To make it easier to install the bomb he even build a small trolley for it, which looks like the ones they use in Top Gun on the aircraft carrier to arm the planes….
I spent the final hour of the day to properly route the throttle and choke cables.
11.06.2009: I spent some time this afternoon sorting out the fuel lines. The lines I got from the factory are shown below.
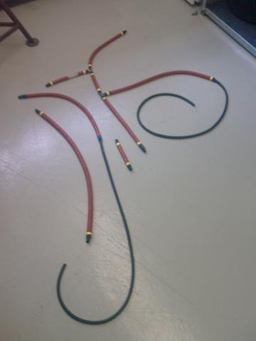
Unfortunately they are not marked, so I have another puzzle to solve. I also have to figure out where to insert the vapor lock Y as well as the fuel flow sensor…
20.06.2009: After four days in Stockholm I continued with the panel today. I started with building a wooden frame that allows me to assemble the full panel outside the aircraft.
I then started with the air lines. I am using a separate TSO’d altitude encoder for the GNS430, as well as a pitot tube with angle of attack feature , so quite a bit of tubing is required.
I also checked whether the jumpers are set correctly in the altitude encoder. I realised that it is certificated up to 42’000 ft or 12’810 m, I guess that should be enough….
21.06.2009: Summer starts today, but the weather is more like early spring. This is good for building…
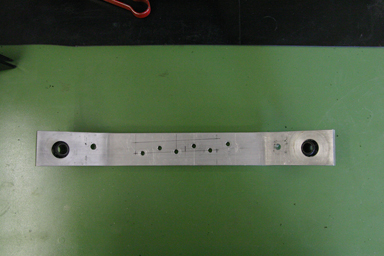
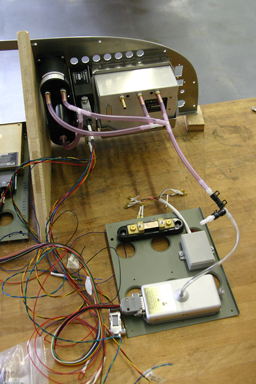
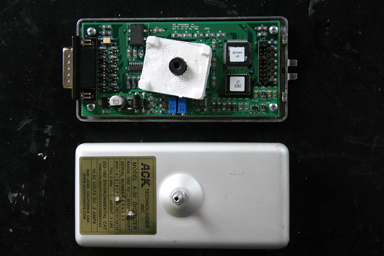
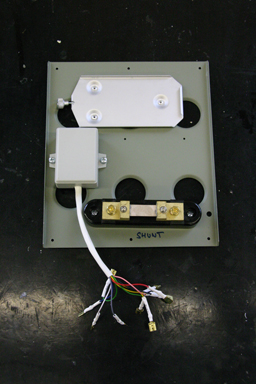
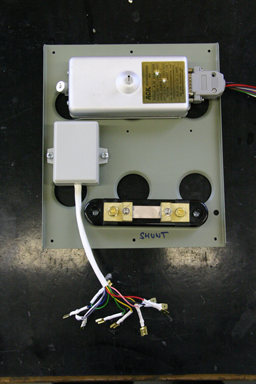
Behind the panel of the SportCruiser is a flat plate onto which some electrical stuff is mounted, such as the shunt to measure the current consumption (bottom on the pictures below) as well as the relay box needed to have trim buttons on both sticks (left). There was still some room, so I put the altitude encoder for the transponder there too (top, left picture the mounting plate only, right picture with the encoder).
I then finished the installation of the automotive type 12 V receptacle. I put it inside the storage compartment under the arm rest between the seats (e.g. for charging mobile phones, iPods etc.), but as the rear wall is quite thin I put a reinforcement plate onto it. I can’t access the rear face of the receptacle once the the armrest is riveted in, so I riveted two nutplates in to mount the receptacle with screws. Like that I can always remove it if necessary.
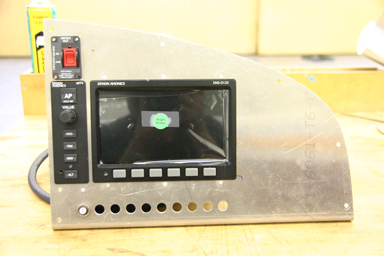
23.06.2009: I’m in bed with the flu, so not much progress. I did manage to hook up the Dynons (EFIS D-100, EMS D-120, HS34 and Autopilot AP74) and they happily work together. Cool. I do need to update the software on all units to use the AP74, but I have to wait until the panel is in the plane and the autopilot servos connected, as they need to be updated at the same time.
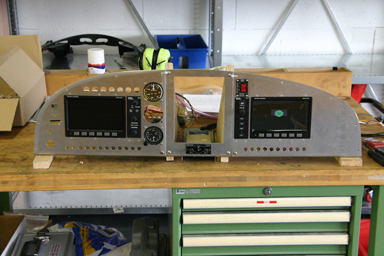
24.06.2009: Here a picture of the panel on the workbench in my cellar.
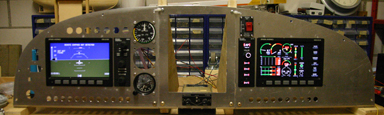
I’m adding instruments piece by piece with checking the correct functioning after each step. The Dynon’s talk to each, I can display information from each unit on whatever screen I want. I also checked the auto-dimming function, which uses the brightness sensor of the HS34, so that works too.
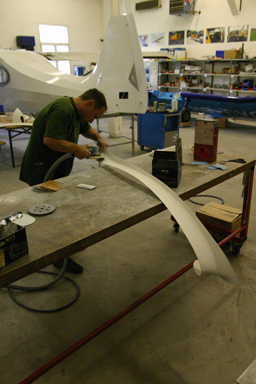
Today we started finishing painting all the small bits, such as ailerons, flaps, wing fairings, wheel pants etc. We do that at Andy Rombach’s workshop. I started sanding the canopy. We use a different white than the factory for the fuselage, so we have to paint the canopy frame too. Inside we will paint it the same anthracite we already used for the interior. While I was preparing the canopy, Andy painted the ailerons.
I also checked the fuselage to make sure that all small bits have the correct color. I am considering painting the main gear legs red, as well as the wheel pants, but I am not yet decided. In the UK they don’t allow homebuilders to paint the composite legs in a dark color due to the possible negative effect of the sun heating them too much, but I just wonder how the sun should shine onto them unless you fly upside down.
25.06.2009: Rolf and I continued today preparing all the small bits for painting. Andy, our painter, is a perfectionist, so he pushes us to sand every piece to perfection…
To paint the access hole covers we had to fix them somehow. We made small balls out of masking tape and put them between the covers and a piece of wood wrapped in paper (not to blow dust out of the pores). Like that the covers have some distance from the surface, so they won’t stick to the paper.

The ailerons where finished so we moved them out of the paint booth. Just behind them is a model plane which had a landing accident…. I hope this will not happen to us.
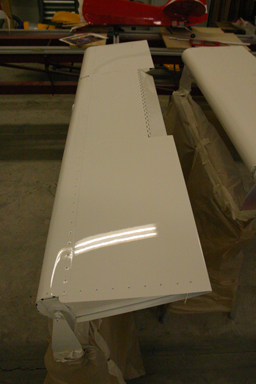
The finish of the ailerons is just perfect, with a nice shine.
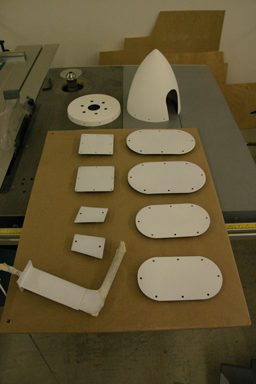
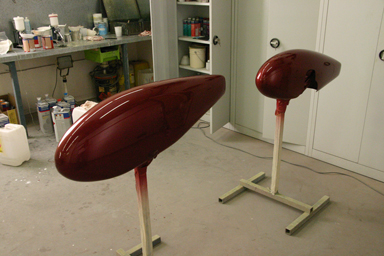
Here all the small parts to be painted red…
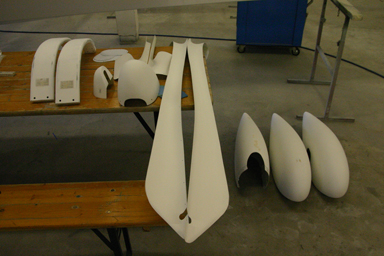
…as well as white.
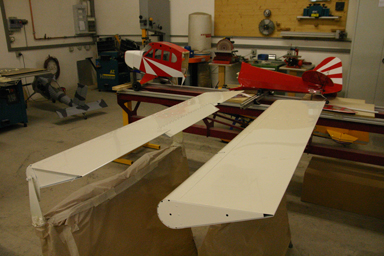
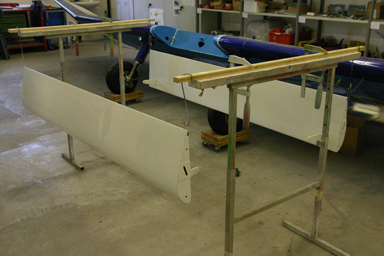
The flaps are finished too.
We had a long discussion again regarding painting the gear legs and the wheel pants. For the gear legs we finally decided to paint them red, even though the LAA does not like this. They claim that composite structures in dark colour get heated too much by the sun, but there is no way for the sun to shine onto them unless it is nearly down on the horizon. By that time it is not strong anymore, or in the case of Switzerland behind a hill or mountain….
Regarding the wheel pants we were not sure whether painting them in three colours similar to the fuselage is worth the effort. I did a quick “repainting” of the wheel pants of another SportCruiser with Photoshop (see below). We concluded that having them in just one colour probably looks as good as with three colours, so we will try this. We can always repaint them later if we don’t like it.
To paint the gear legs we had to remove them from the plane, which took us only about half an hour. The main gear now consists of a party bench with some Styrofoam blocks on it…

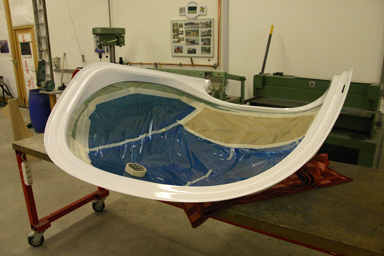
26.06.2009: Today we finished painting the rest. I still had to sand the canopy frame, while Andy started with the red pieces.
I finally found out why god created the high wing airplane. They can serve as clothesline for hanging freshly painted aircraft parts to dry…
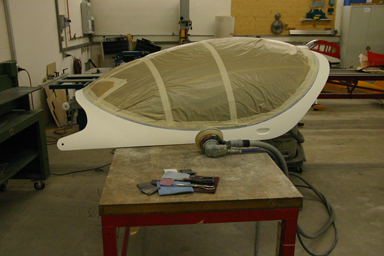
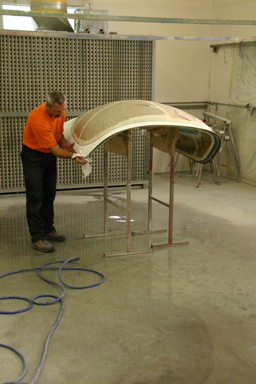
Below Andy in his well equipped paint booth preparing the canopy for the final application of the white outside paint. The booth is even bigger than the one where we painted the fuselage and the wing, the main difference is that you can’t heat it.
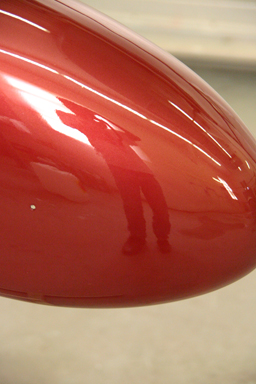
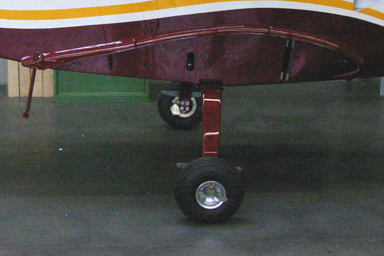
While he was finishing the canopy I took some pictures of the wheel pants. They have a great shiny finish.
You can even see yourself in them. The colour changes quite a lot depending on how the sun shines on it, which gives a nice effect.
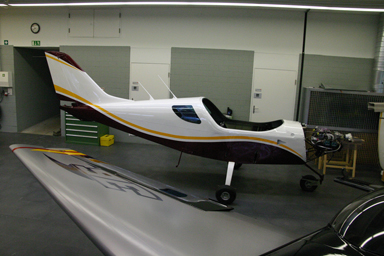
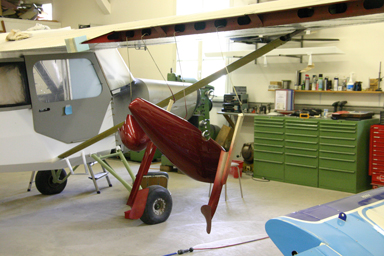
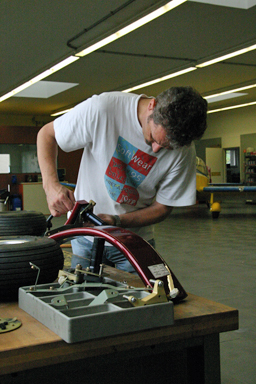
27.06.2009: Today I re-assembled the main gear. It only took me around half an hour. The second time it is much easier, no more puzzle work.
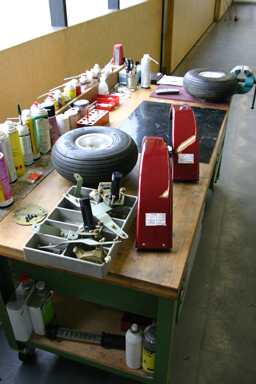
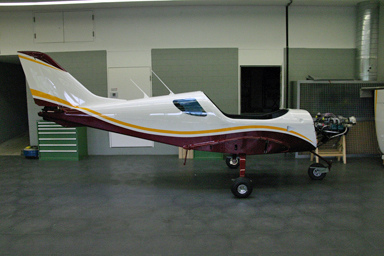
I then re-installed the main gear, so that the fuselage can be moved around again without problem. Sometimes the workshop is quite busy, so our mechanics have to be able to move it our of the way.
I also temporarily installed the wing and elevator fairings with clecos, just to see whether they fit. They do… They will be riveted to the fuselage, but not attached to the wing, so that they stay on even if the wings are removed. I will check with our mechanic whether I should use some sealant to put them on.
Finally I installed the flaps and the ailerons to the wings, mostly to get them out of the way.
30.06.2009: Today I went flying. First I did a tour to the mountains (1 hr 45 min) with an old school friend and his wife in one of the clubs Robin DR400.
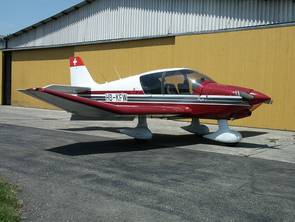
Then in the afternoon I did two tours (1 hr each) to the Rhine fall (biggest waterfall in Europe), first with Eddy, a customer I am working with since probably 20 years, and then with his son. Eddy once flew an L4 himself, and even owned a share in one, but stopped flying 30 or so years ago. I promised him we would go flying some years ago, but we never managed to find a date until now. He still knew not only how to start it, but also how to fly it pretty well. I am sure in a few hours he would solo again.